Skip to content
← GIS plugins
Open sourceQGIS Processing script, 2026

QGIS Stacked Terrain Builder

Turns any DEM into offset "stacked paper" terrain art, natively in QGIS, with an ArcGIS Pro export.
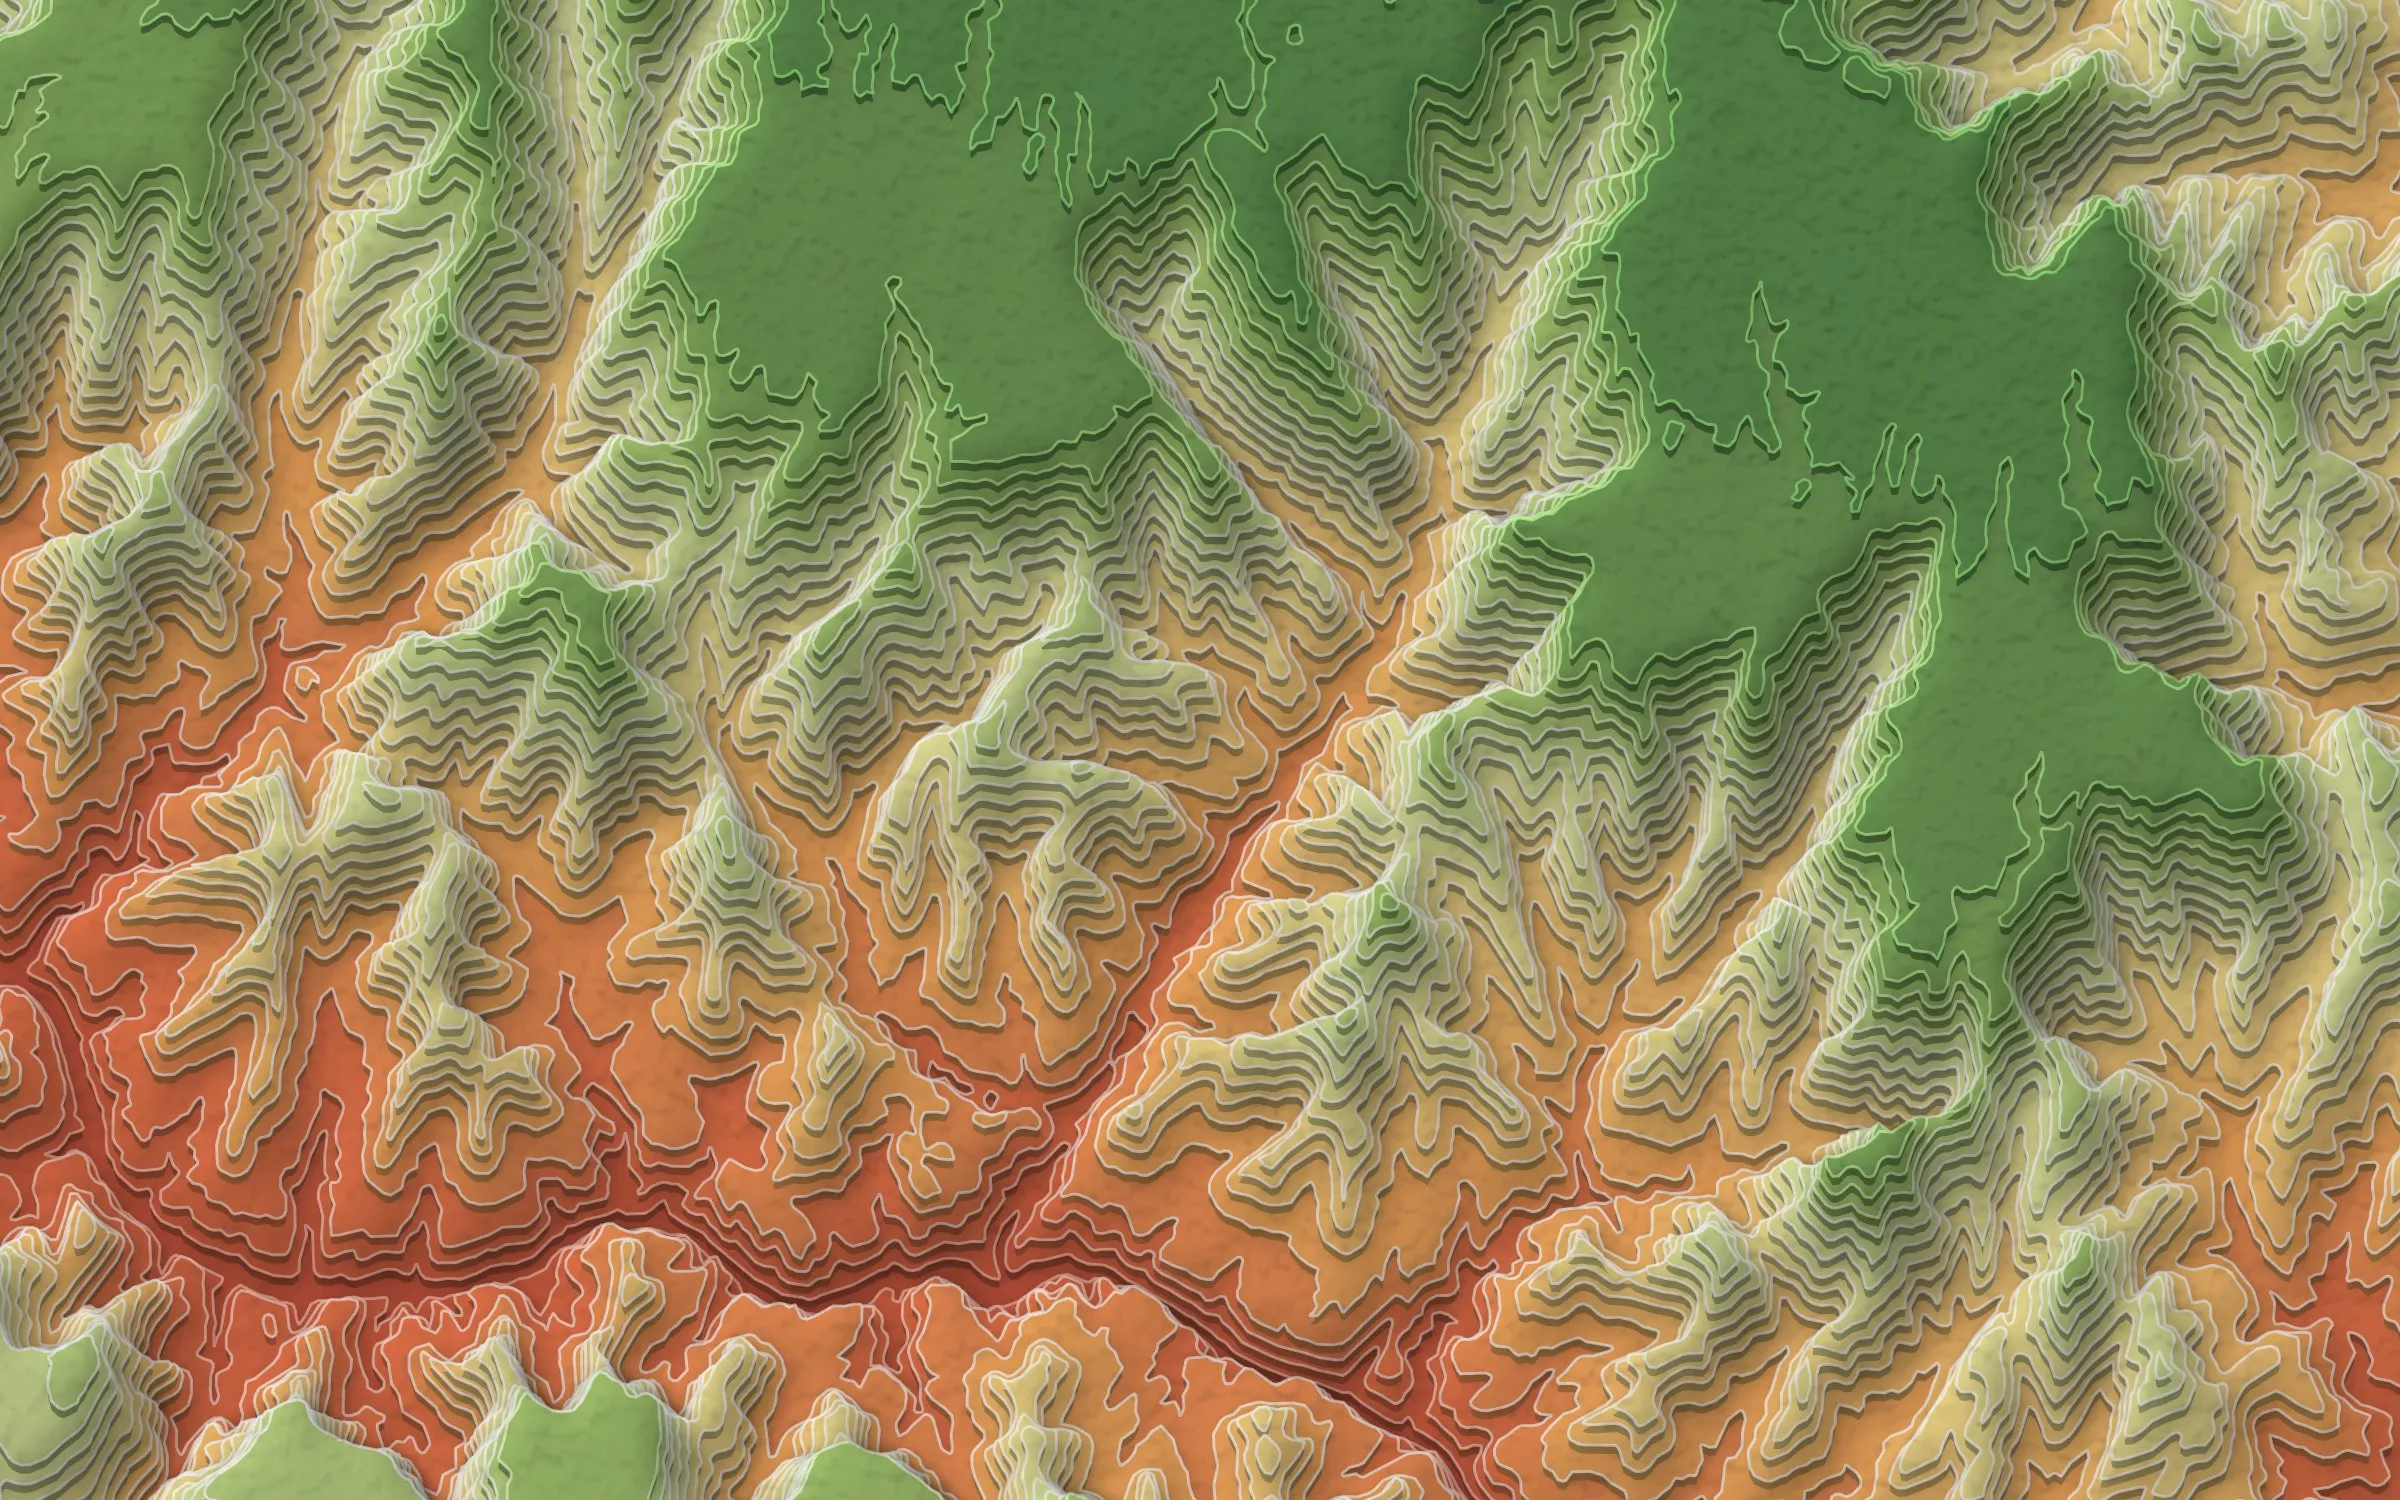
The Grand Canyon around Bright Angel Creek as stacked paper terrain: layered slabs from red rock at the Colorado River up to green forest on the North Rim
The Grand Canyon around Bright Angel Creek, from a run for my map of the Dragon Bravo Fire: oblique view, Paper layers style, Grand Canyon Light ramp, shaded faces and a paper texture. Copernicus GLO-30 DEM.

Each elevation level becomes a solid slab laid over the ones below it, so the landscape reads like layers of cut paper. Pick a view, a light direction, one of three styles and one of nine color ramps, and the tool does the rest: no manual contouring, no hand-built symbology.

How it works

The DEM is averaged to a coarser grid, which gives soft, sinuous outlines instead of noise, and GDAL cuts it into contour bands. Each band is then rebuilt as a true nested slab, all ground at or above that level, so lifted slabs never leave gaps at the map edge. Outlines are smoothed and then simplified, which makes the layer about ten times lighter to draw.

All the styling is one QGIS geometry generator that offsets each slab by its elevation and draws its highlight, wall, shadow and face. Shaded faces can’t use an ordinary hillshade, because every slab is shifted by its own lift. Instead, the tool pastes hillshade under each slab at that slab’s lifted position, the same way the renderer stacks them.

Built to travel

Each run gets its own folder: a GeoPackage with the style embedded, sidecar styles, and a .qlr layer file that drops the whole stack into another project in the right order. An optional ArcGIS Pro export writes a matching .lyrx, with the lift and walls built into the geometry, since Pro’s symbols can’t do what the QGIS geometry generator does.

A single Processing script with no extra installs. Developed and tested on QGIS 4.2.

Inspiration and credits

  • John Nelson, Make this AI-inspired topo landscape please (Adventures in Mapping, December 2023). The oblique “offset stacked” look is adapted from this ArcGIS Pro technique, and the built-in Teal-Orange and Lime-Orange ramps are modeled on his maps. This tool re-implements the idea natively in QGIS.
  • Tanaka and Pauliny illuminated contours, the classic relief-shading methods Nelson’s technique draws on. The nadir view is closest to those.
  • Copernicus GLO-30 elevation data, used for every image on this page.

How it runs

A DEM in, a styled map out. The tool runs from the QGIS Processing Toolbox, and everything after the run is adjustable on the layer itself.
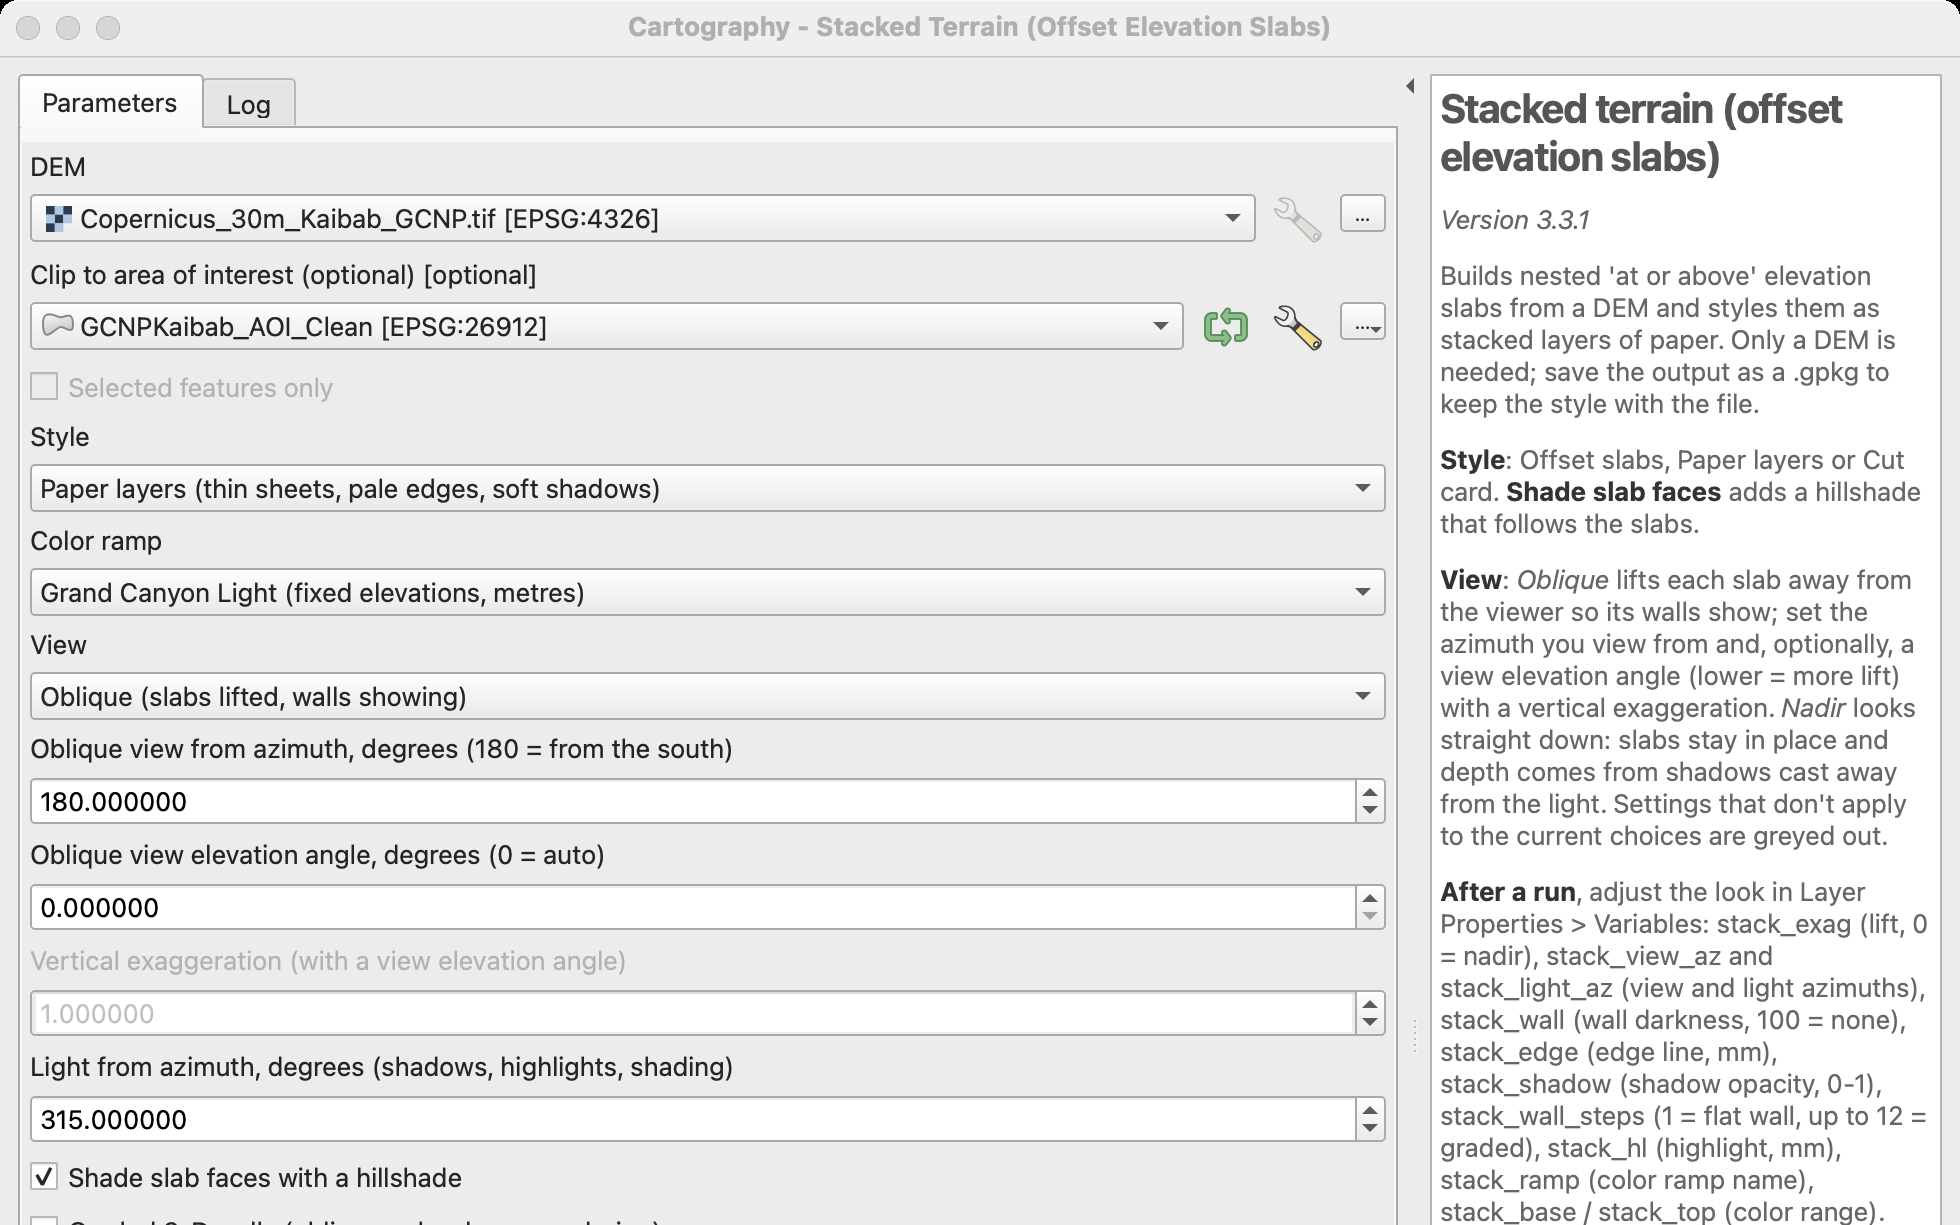
The Stacked terrain dialog in QGIS, set to the Copernicus DEM, the Grand Canyon and Kaibab outline, Paper layers, Grand Canyon Light and an oblique view
Set upOne dialog: a DEM, an optional outline to clip to, a style, a color ramp, a view and the light. These are the settings of the run above.
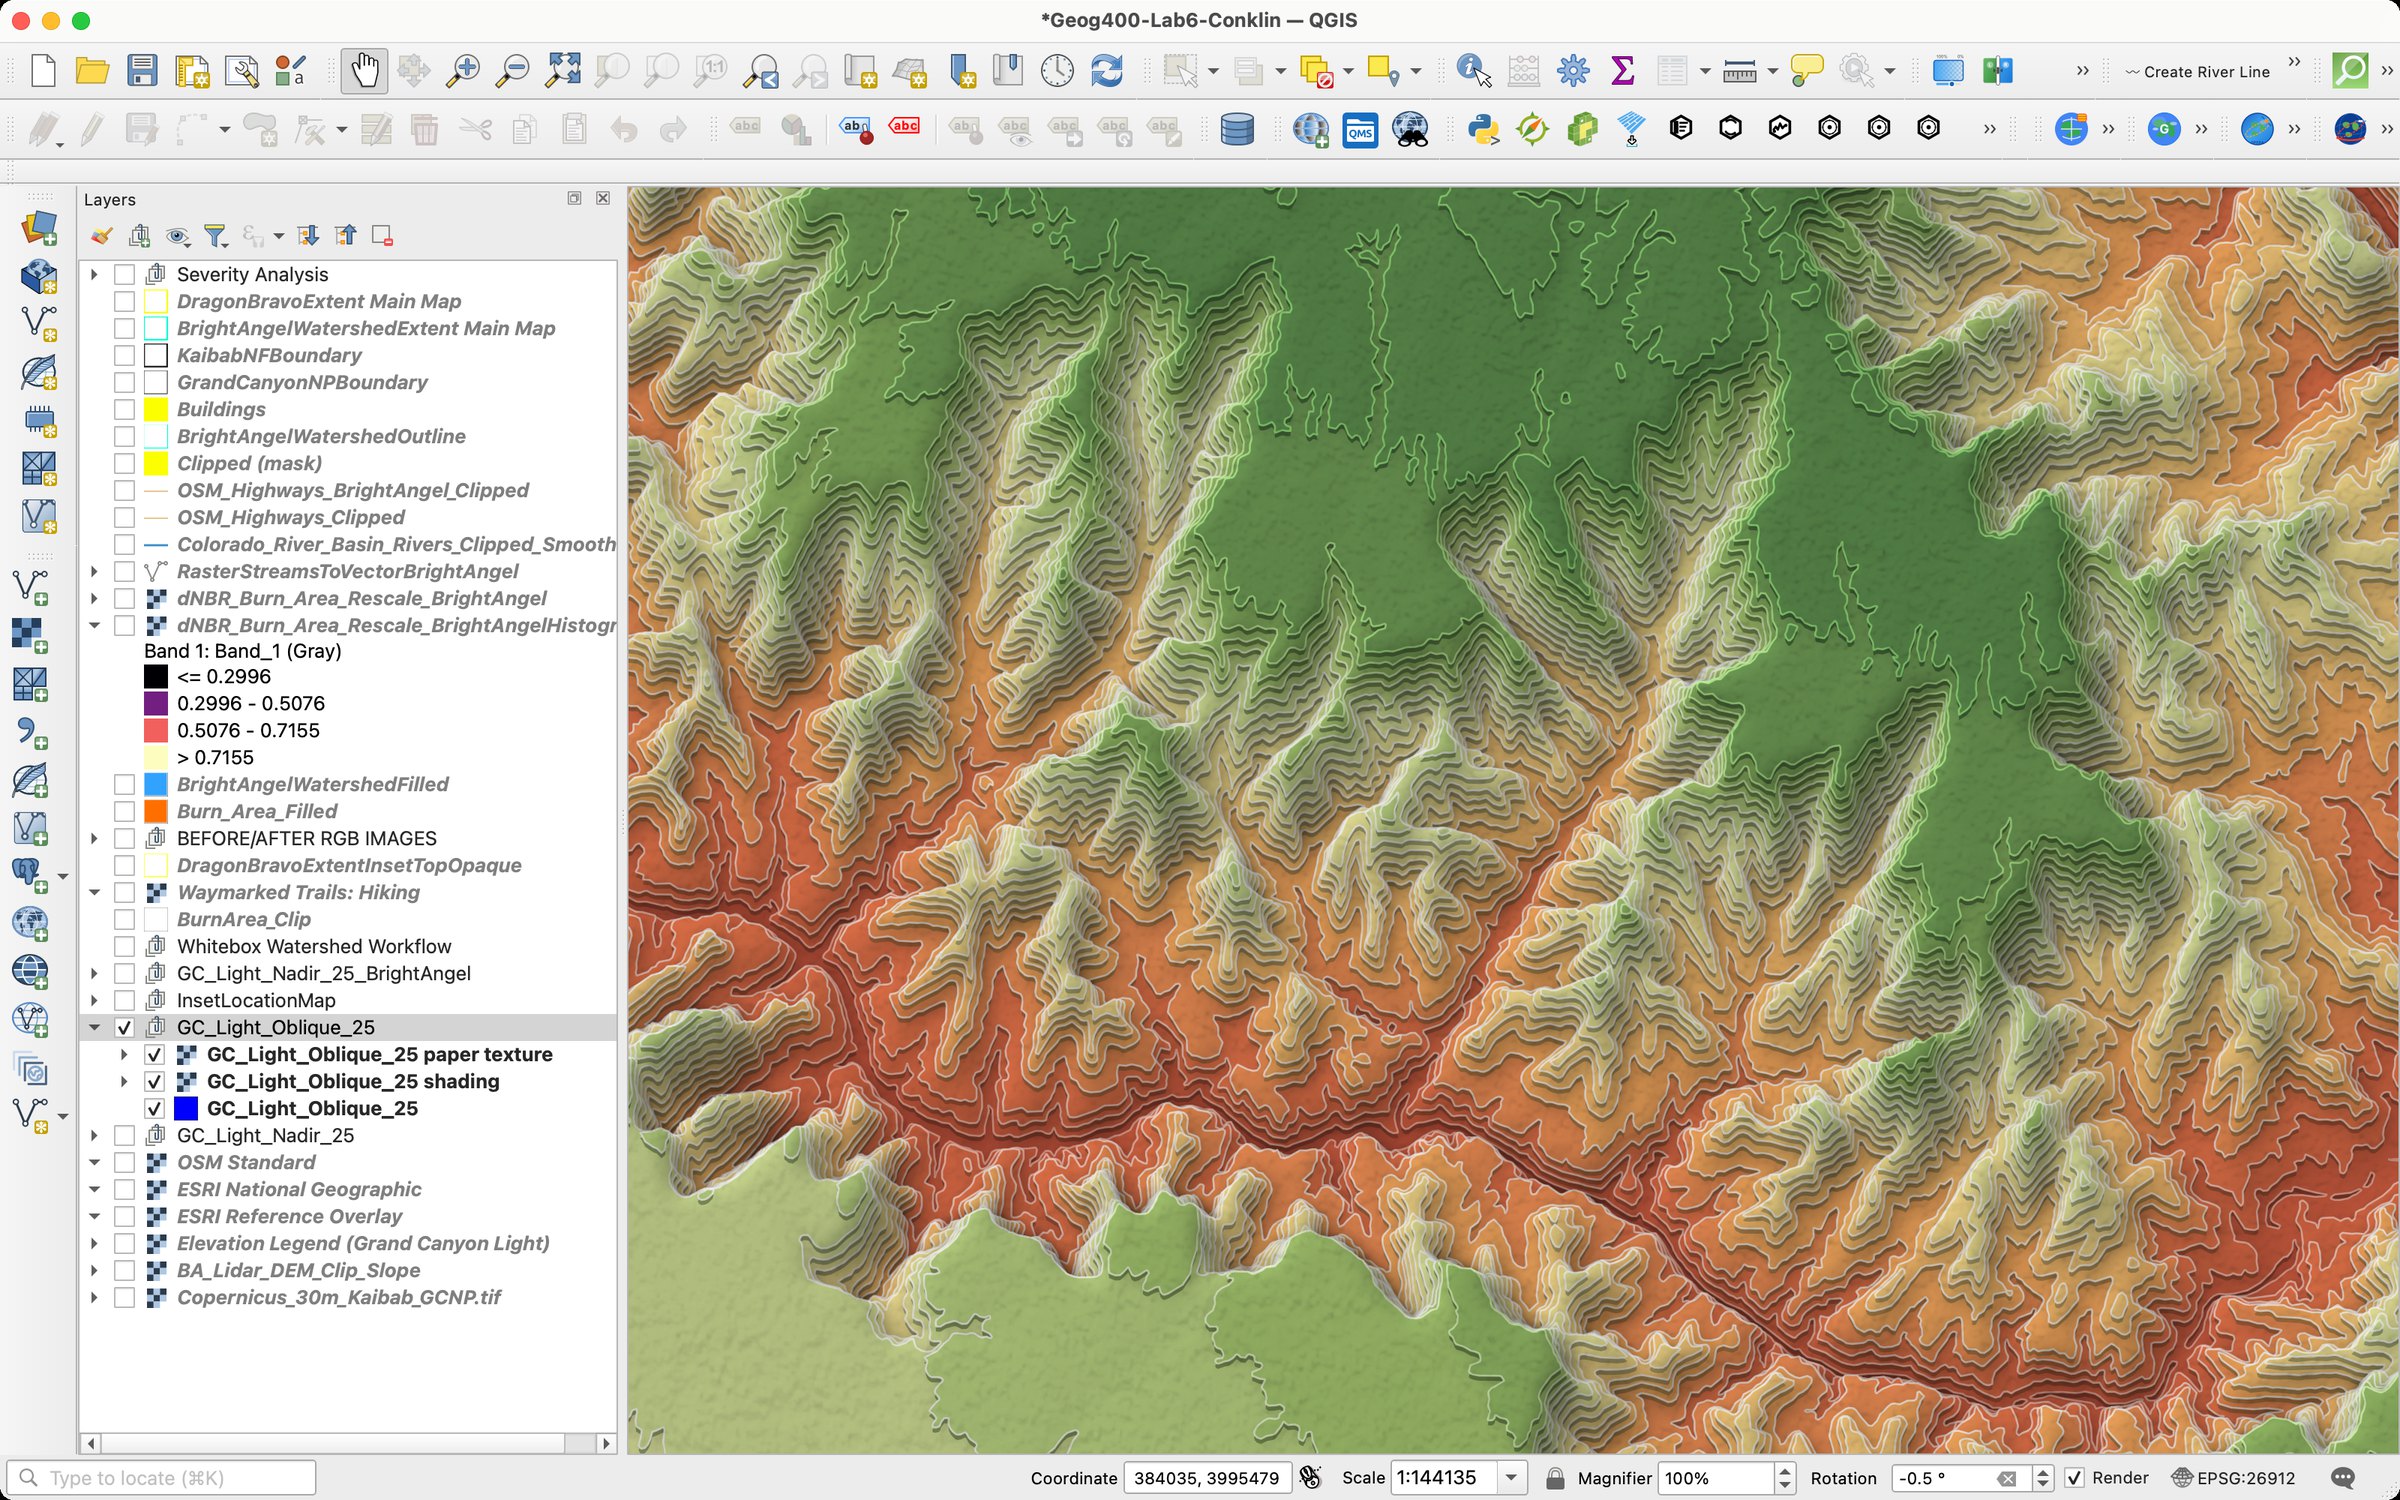
QGIS with the stacked terrain group in the Layers panel and the Grand Canyon on the map
Results in QGISSlabs, shading and paper texture load as one styled group. The style is embedded in the GeoPackage, so the layer opens styled anywhere.
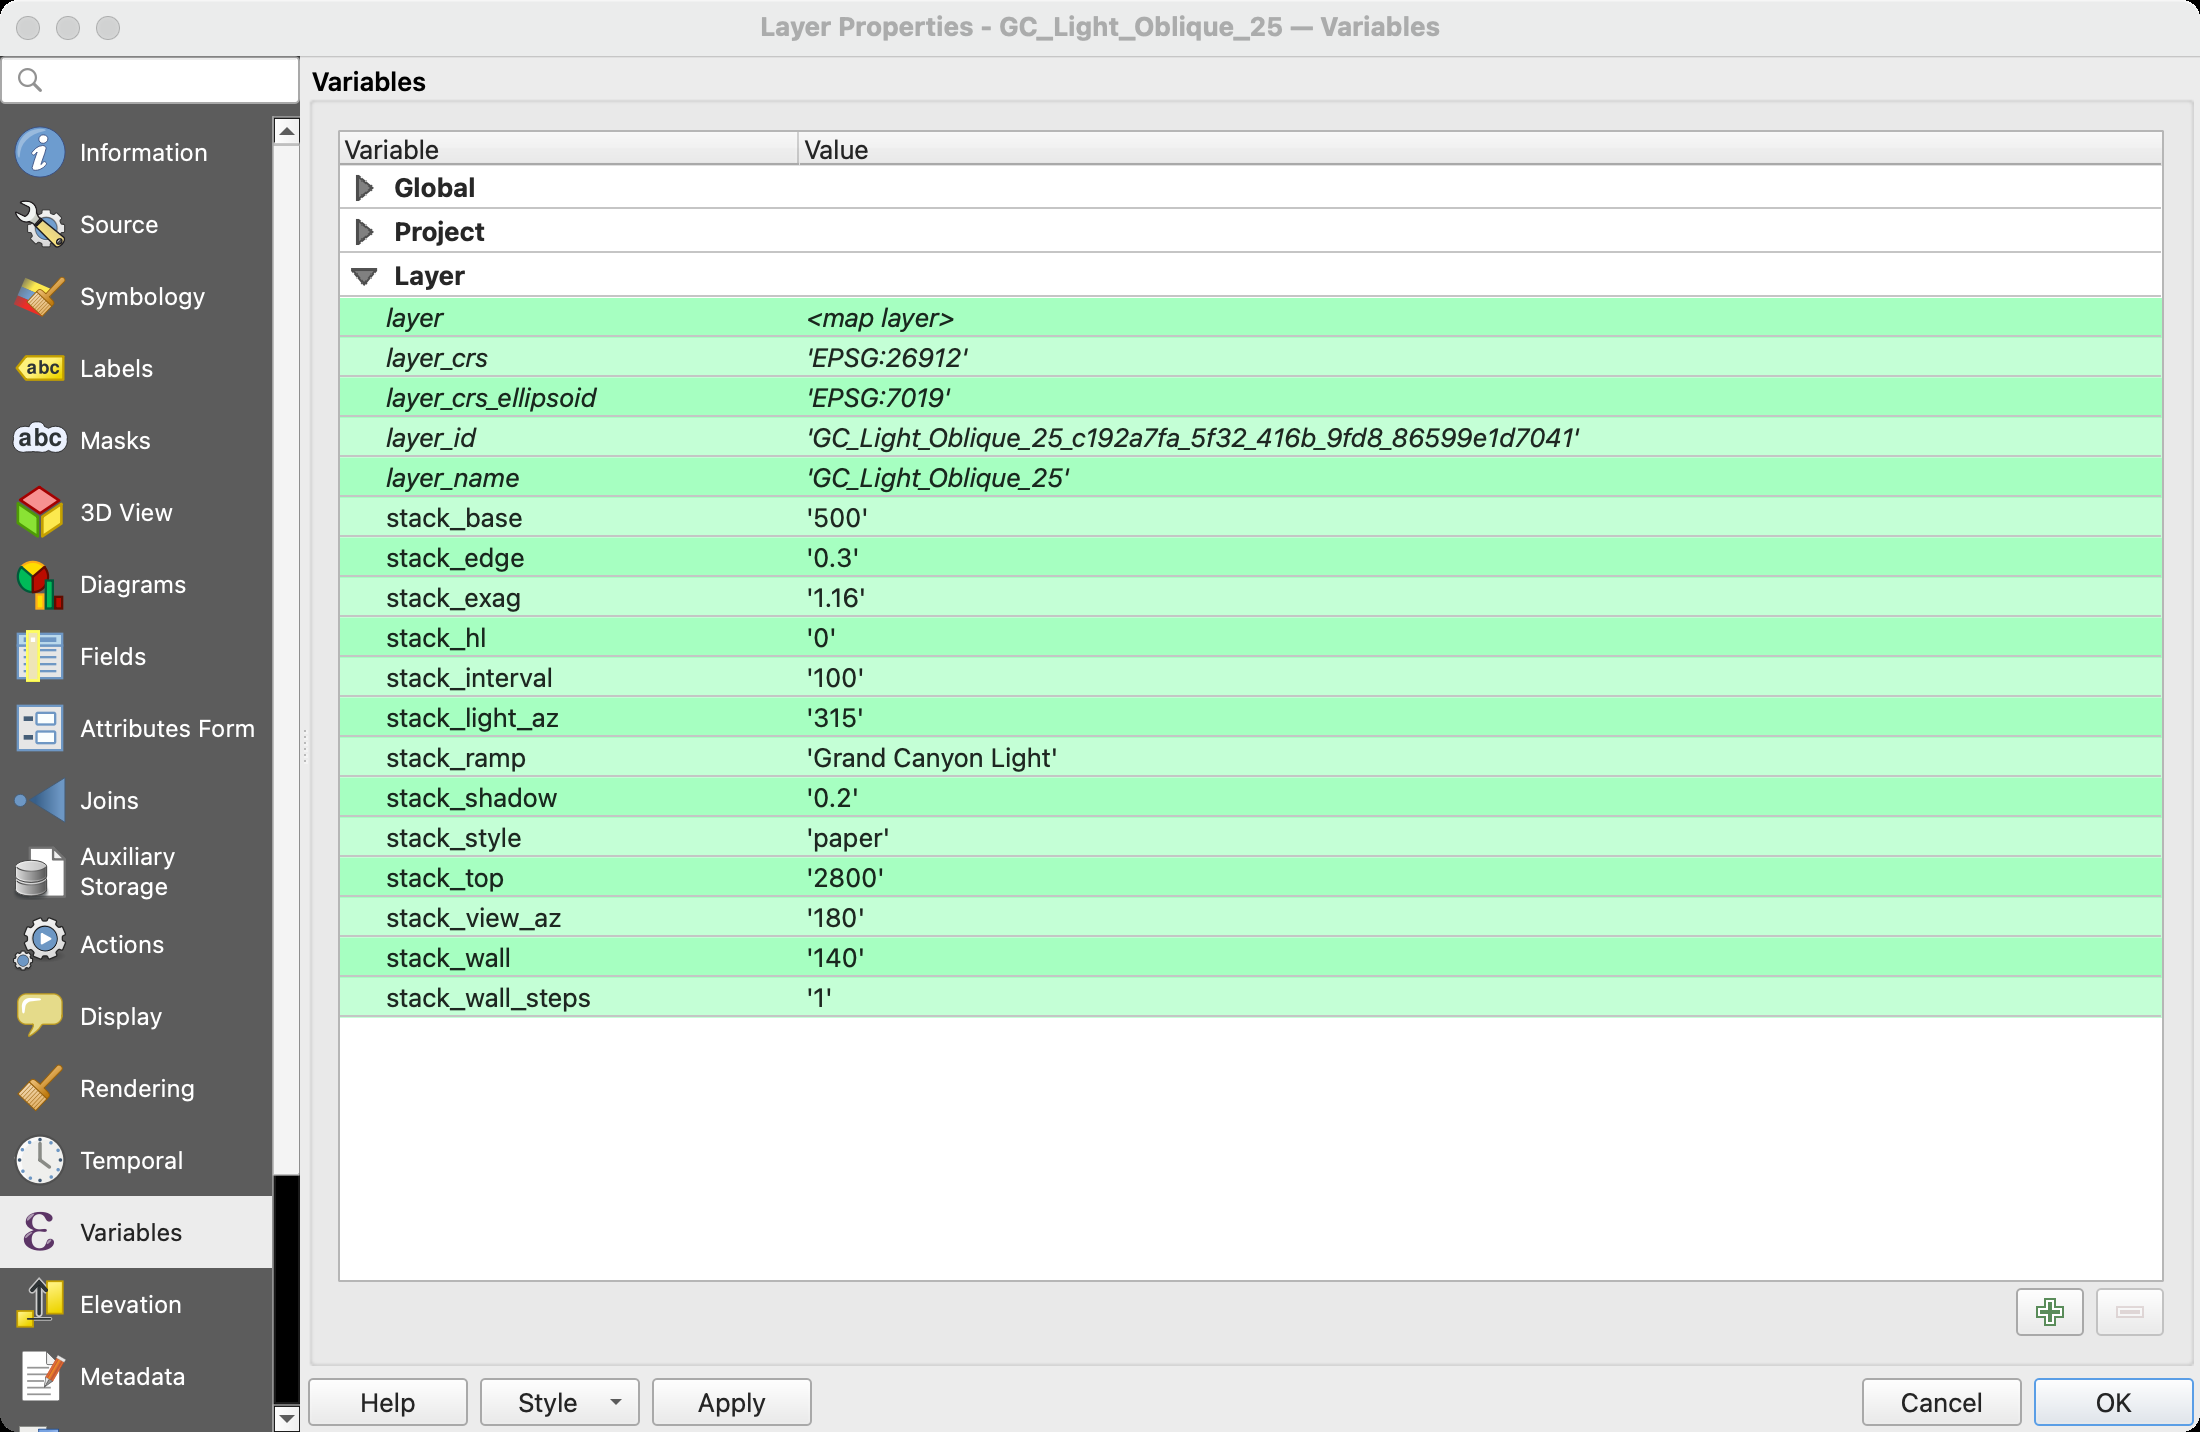
The Variables page of the stacked terrain layer's properties, listing the stack_ variables
Adjust without rerunningLift, view and light direction, walls, shadow, edges and ramp are layer variables: change one and the map redraws.
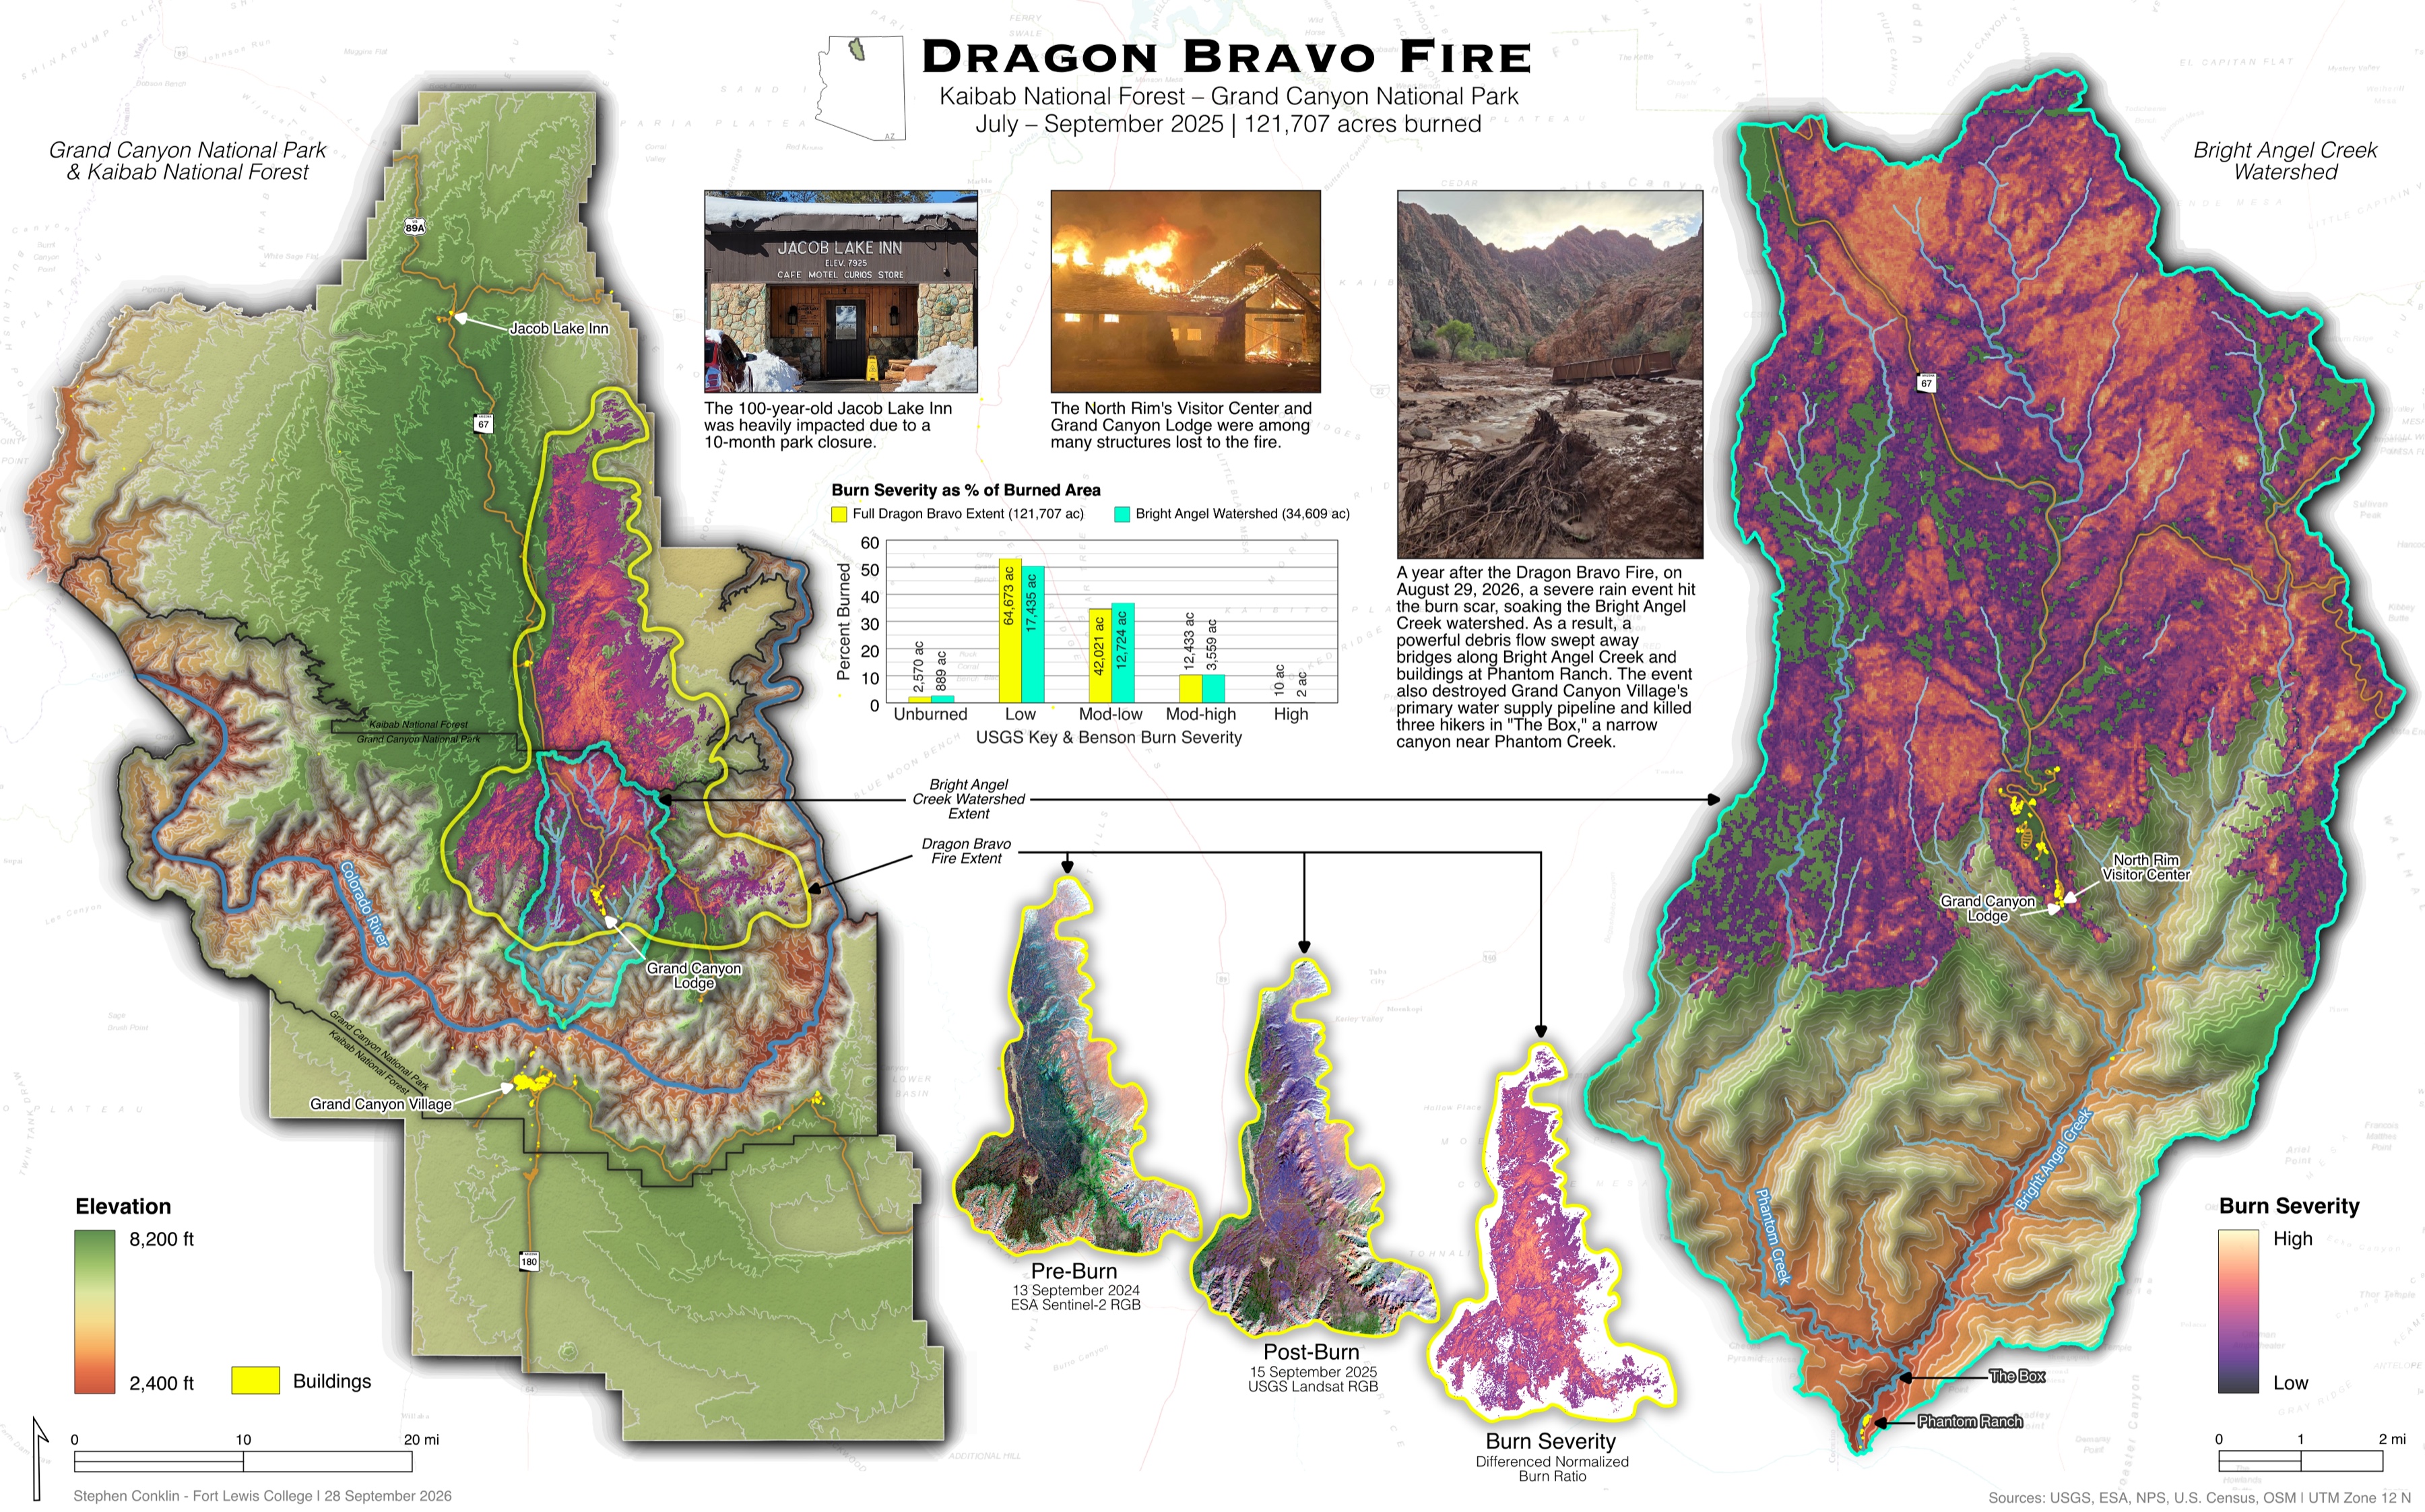
The Dragon Bravo Fire map, with stacked terrain as the relief under the burn severity layers
Use it in a mapGrand Canyon Light runs are the relief under both maps of my Dragon Bravo Fire map.

From DEM to stacked terrain

The same 16 by 10 km of canyon around Bright Angel Creek at each stage. The lifted stages are framed a little further north, because the oblique view moves higher ground up the page.
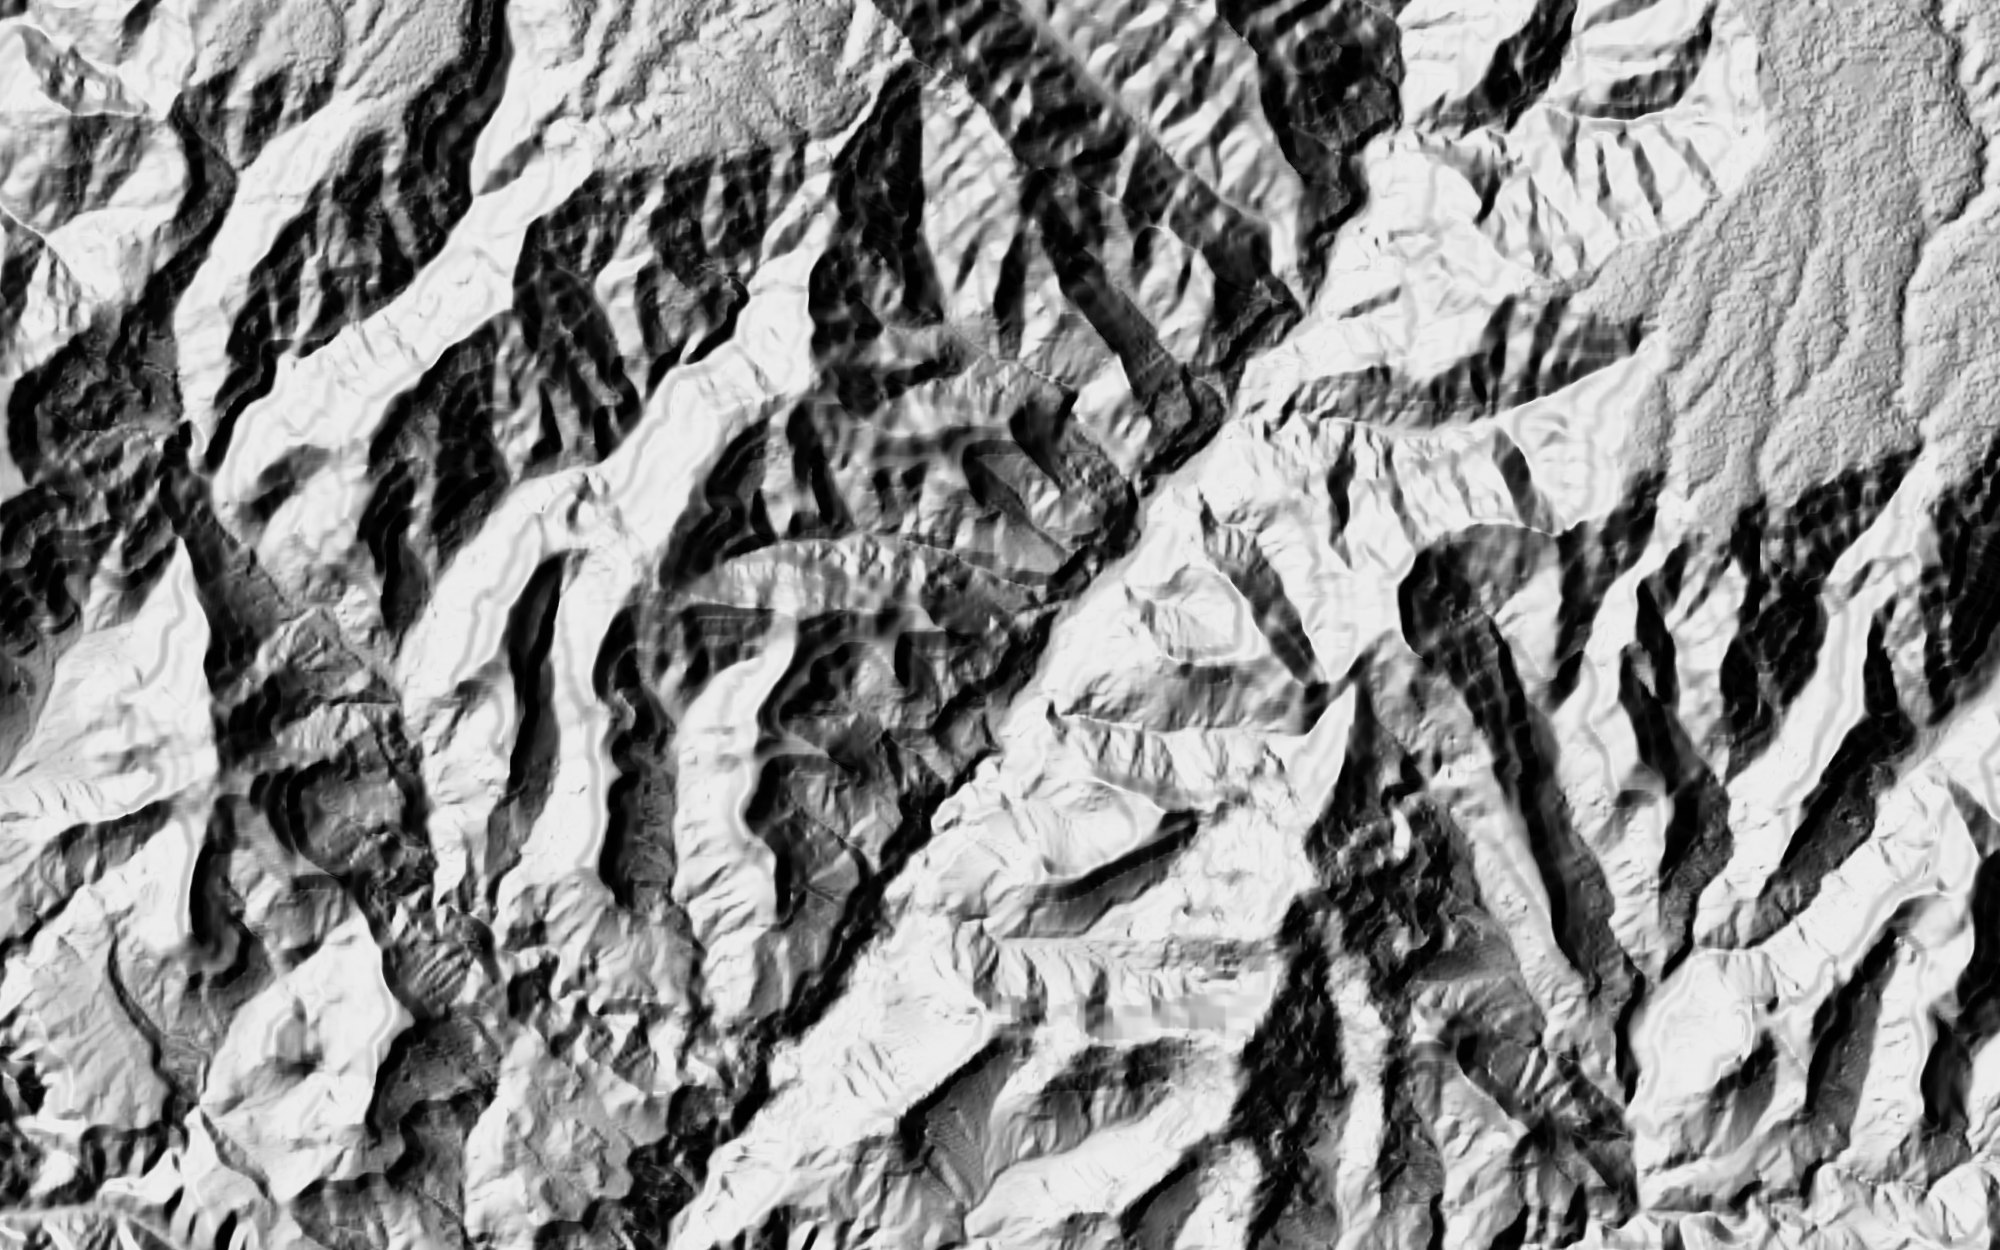
Grayscale hillshade of the Copernicus elevation model for the Bright Angel area
The DEMCopernicus GLO-30 elevation, shown here as an ordinary hillshade.
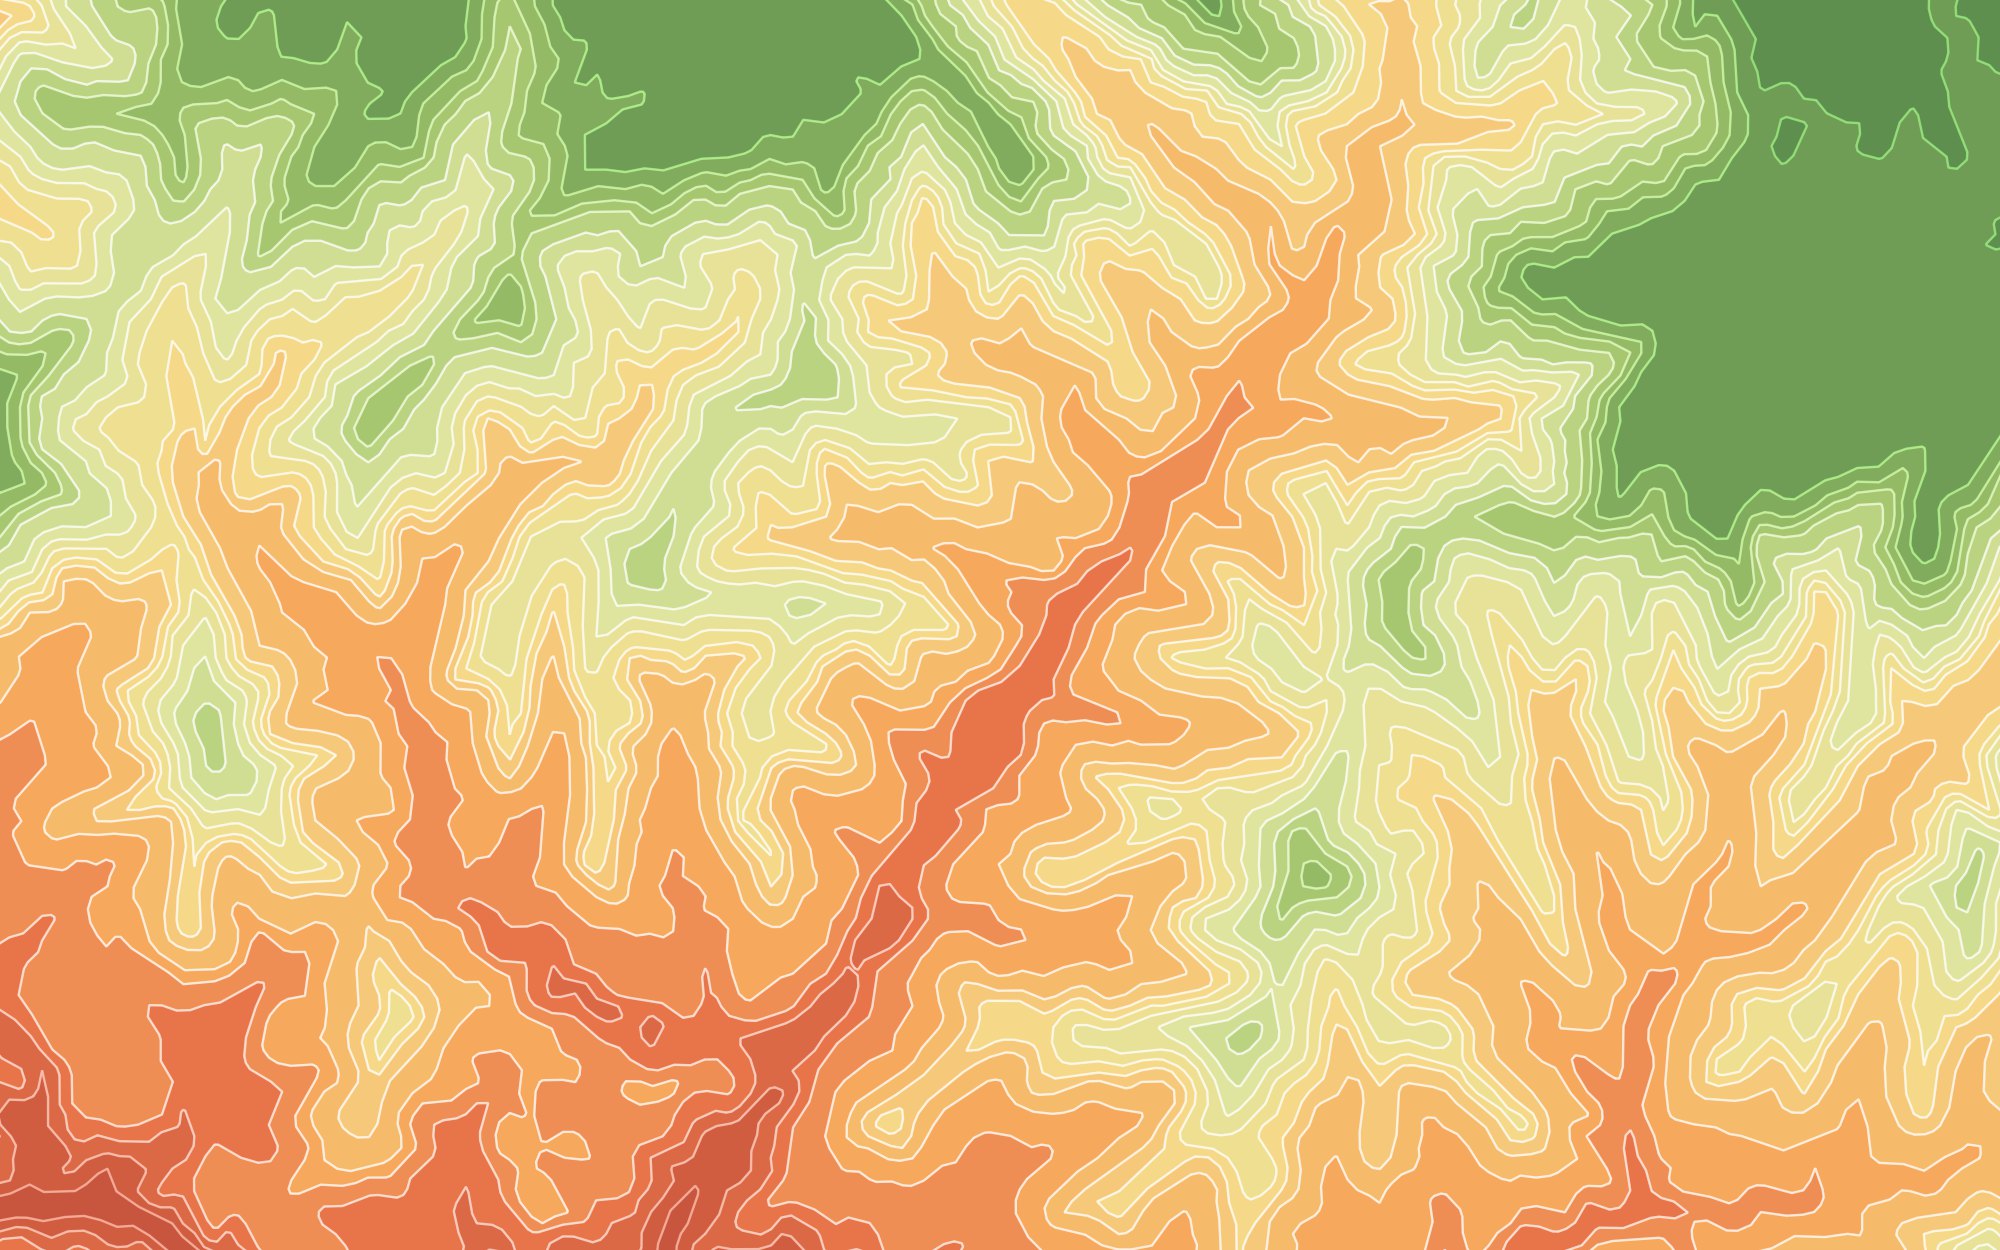
Flat colored elevation bands with pale outlines, before any lift or shading
Nested slabsThe DEM is generalized and cut into slabs, each holding all ground at or above its level, colored by elevation.
The same slabs lifted northward in proportion to their height, with walls showing beneath each one
Lift and wallsEach slab is shifted away from the viewer by its height, and a darker wall shows beneath it.
The lifted slabs with shaded faces and a paper texture
Shading and paperA hillshade that follows each slab's lift, plus a paper texture, both blended with Multiply.

Two views

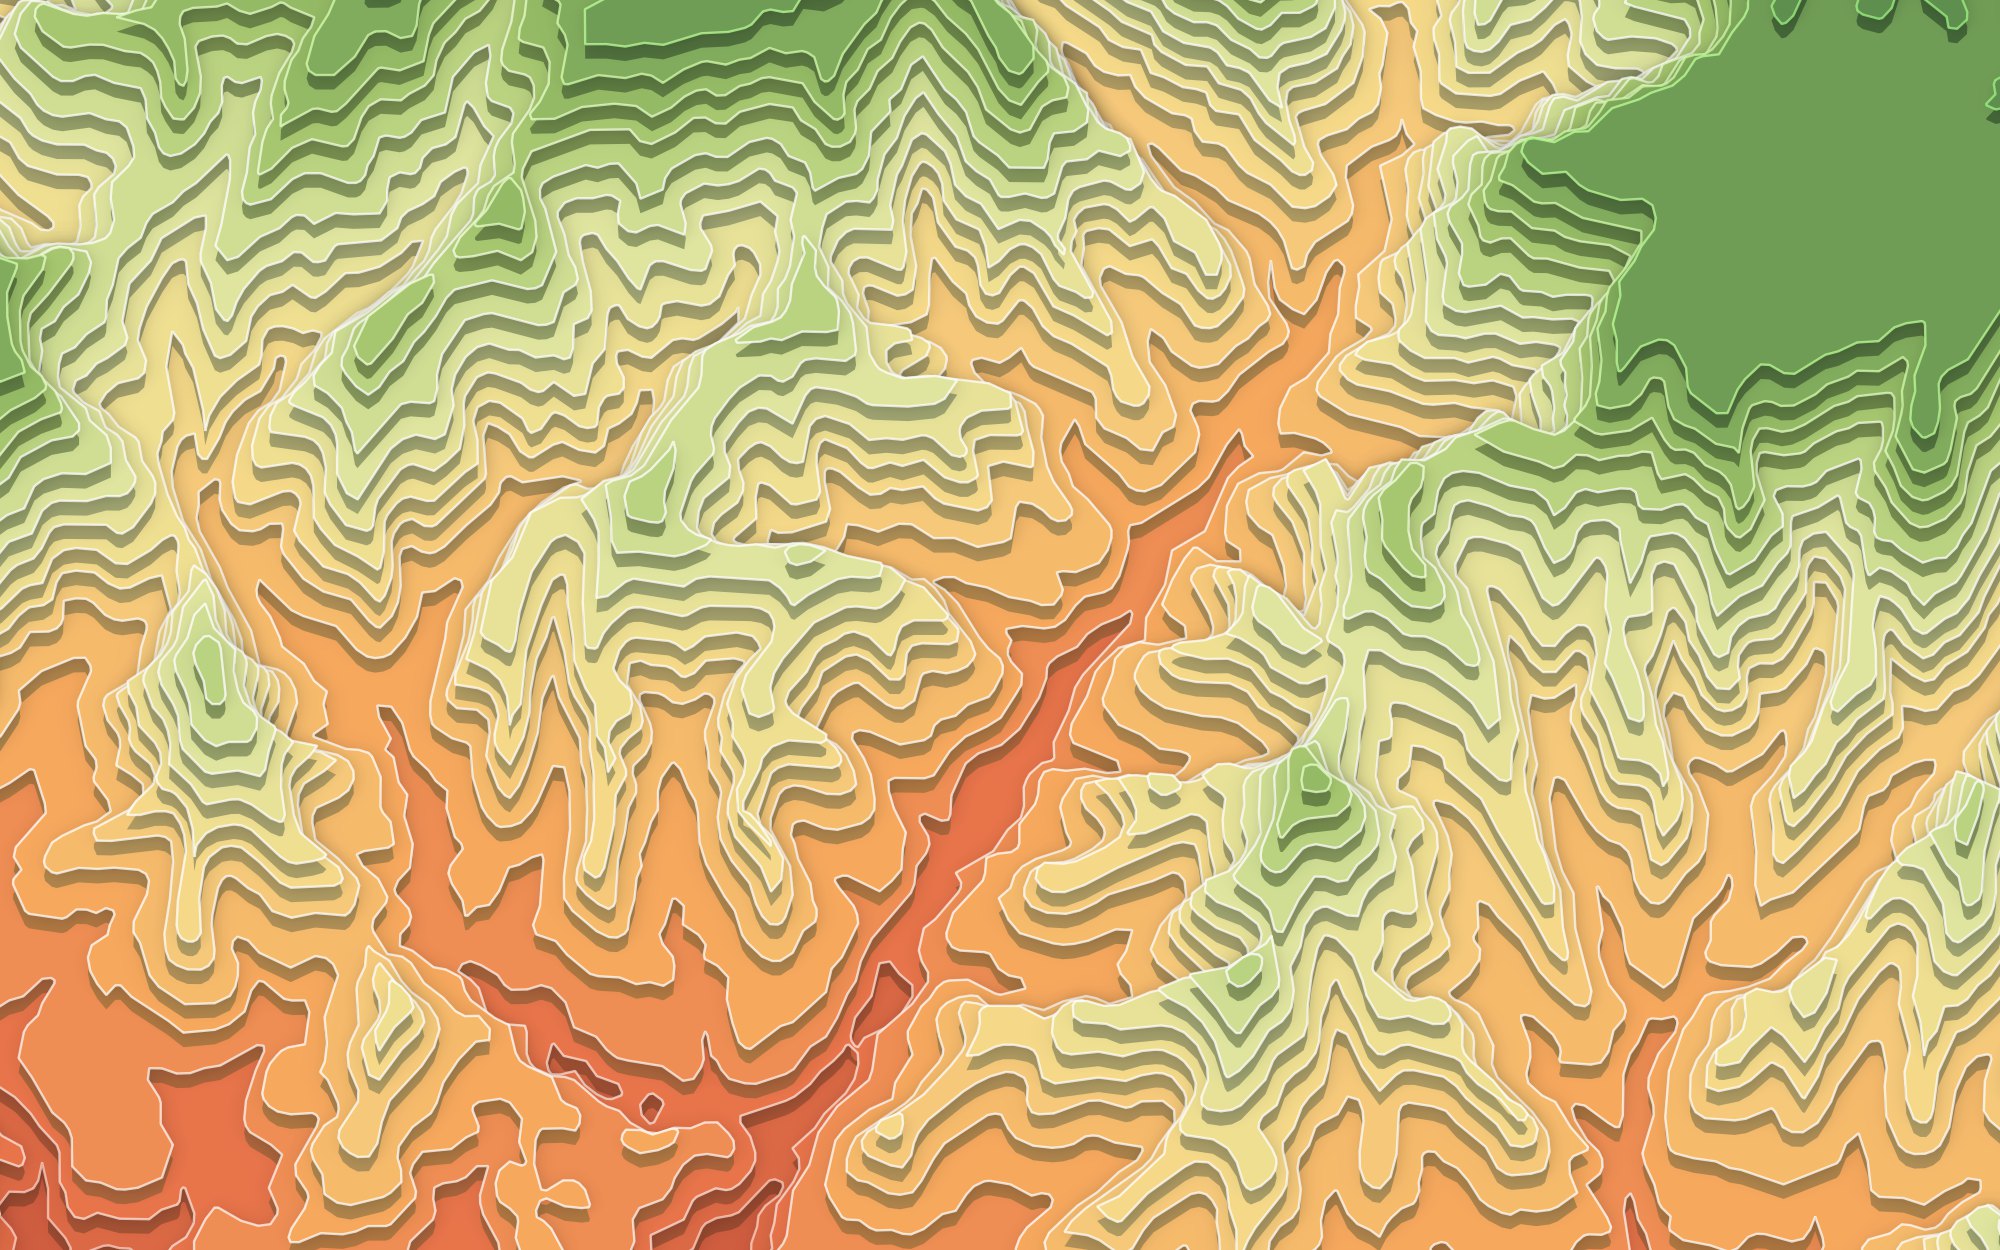
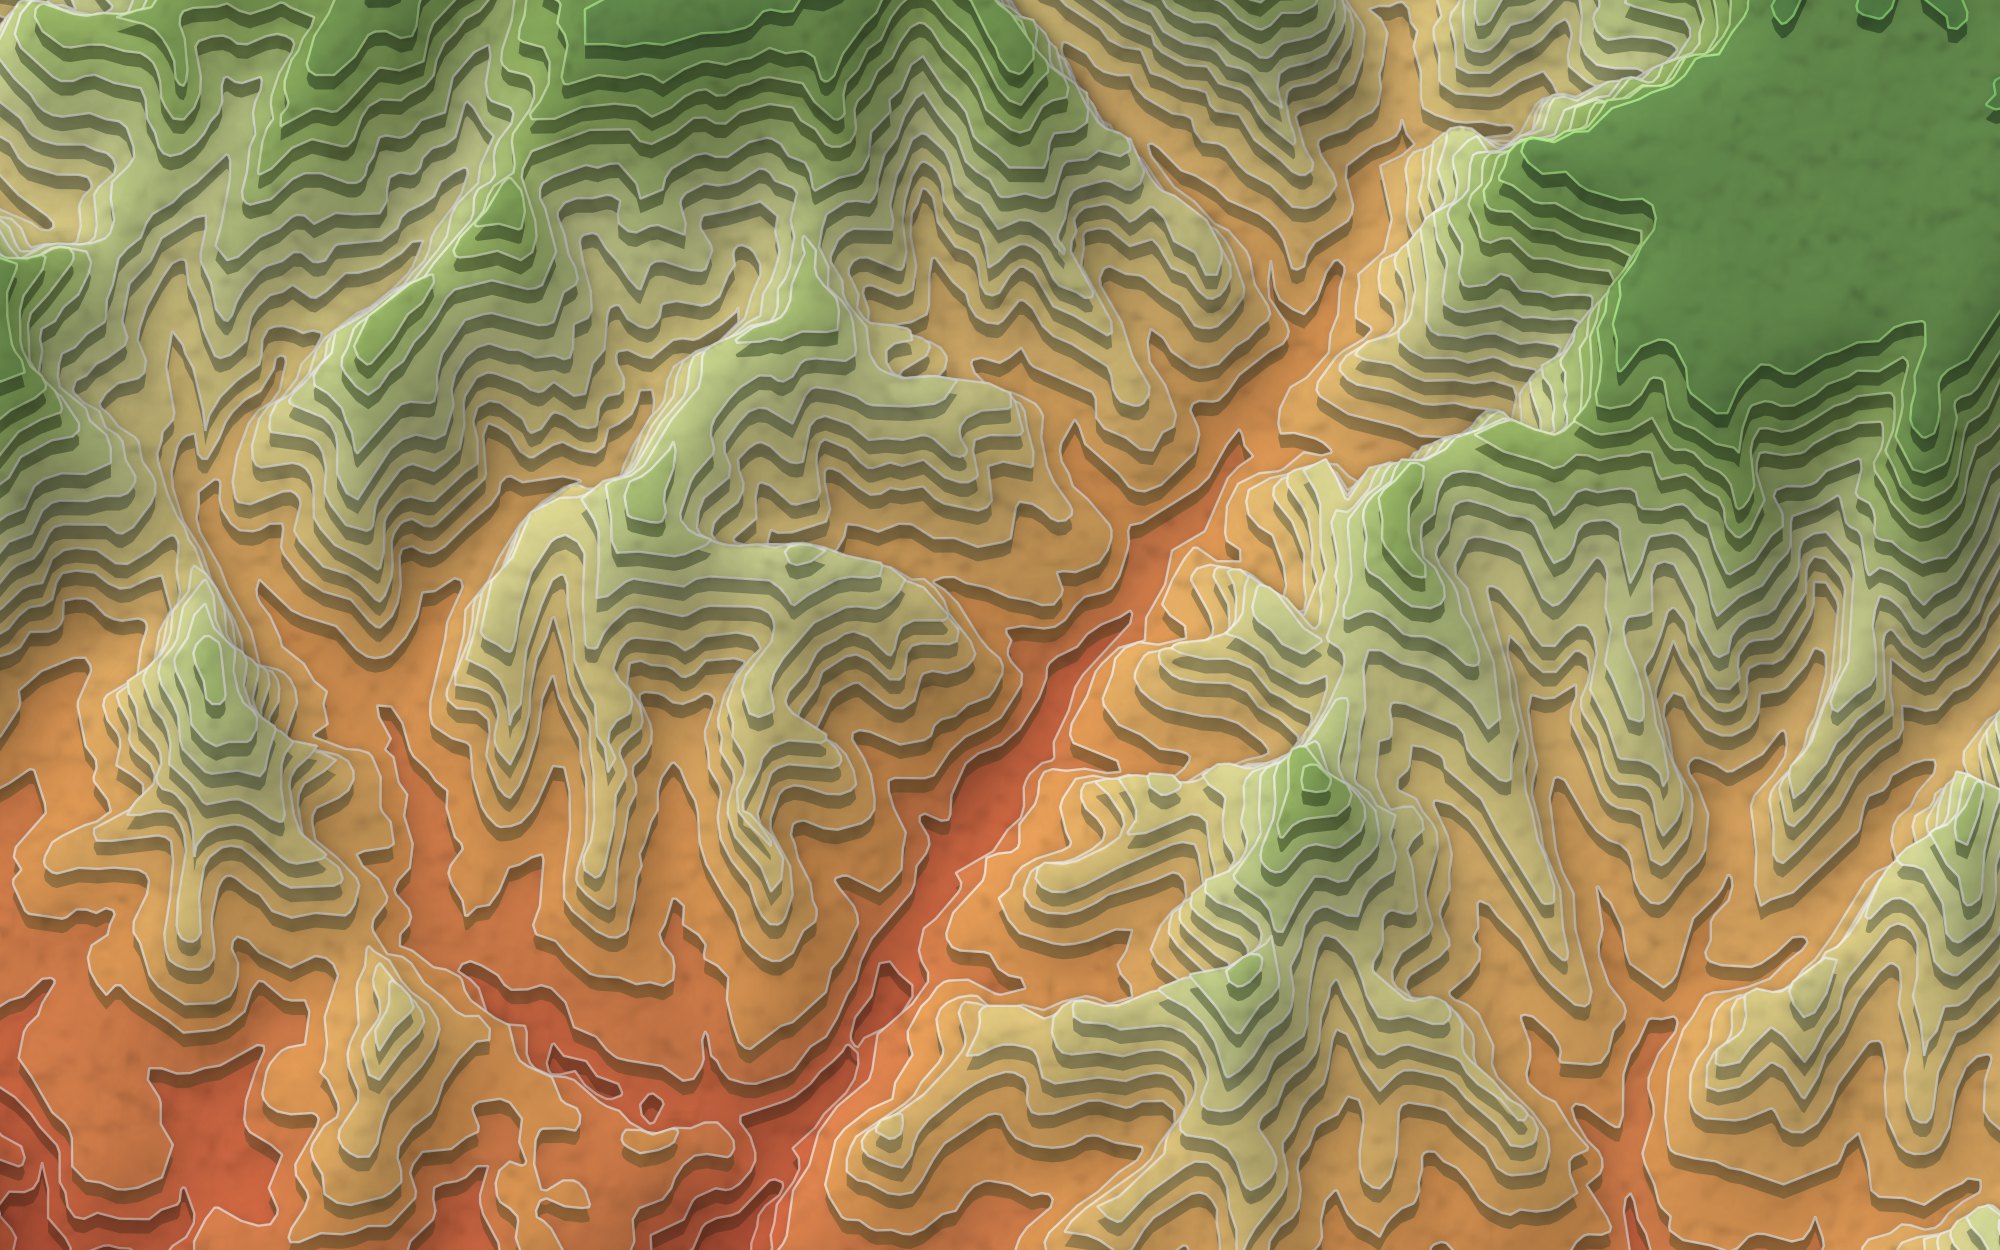
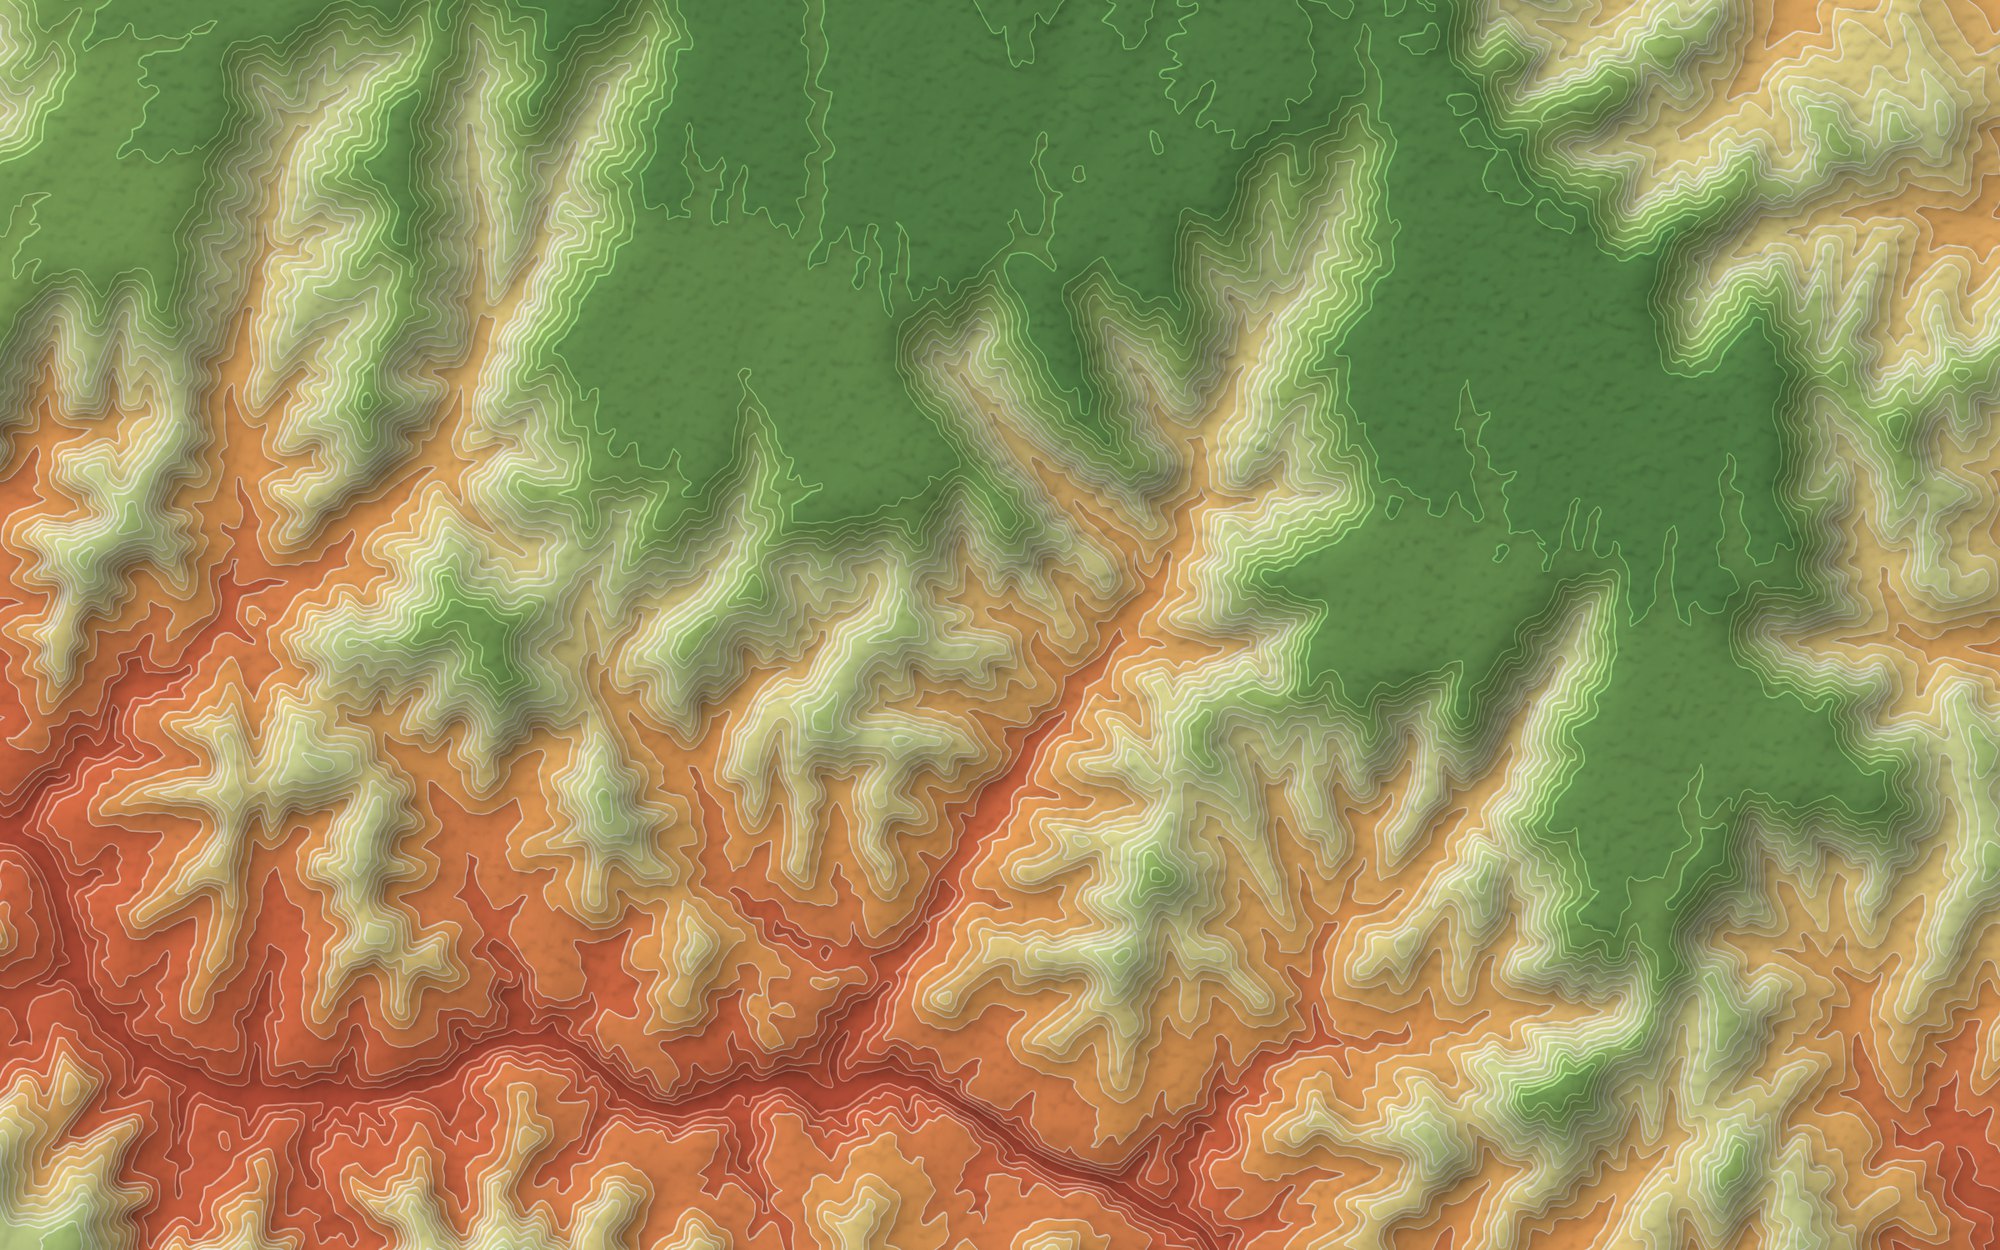
Oblique lifts the slabs so their walls show. Nadir keeps every slab in its true position, so the map can still be measured and overlaid, with depth from shadows and lit edges. Same area, same settings otherwise.
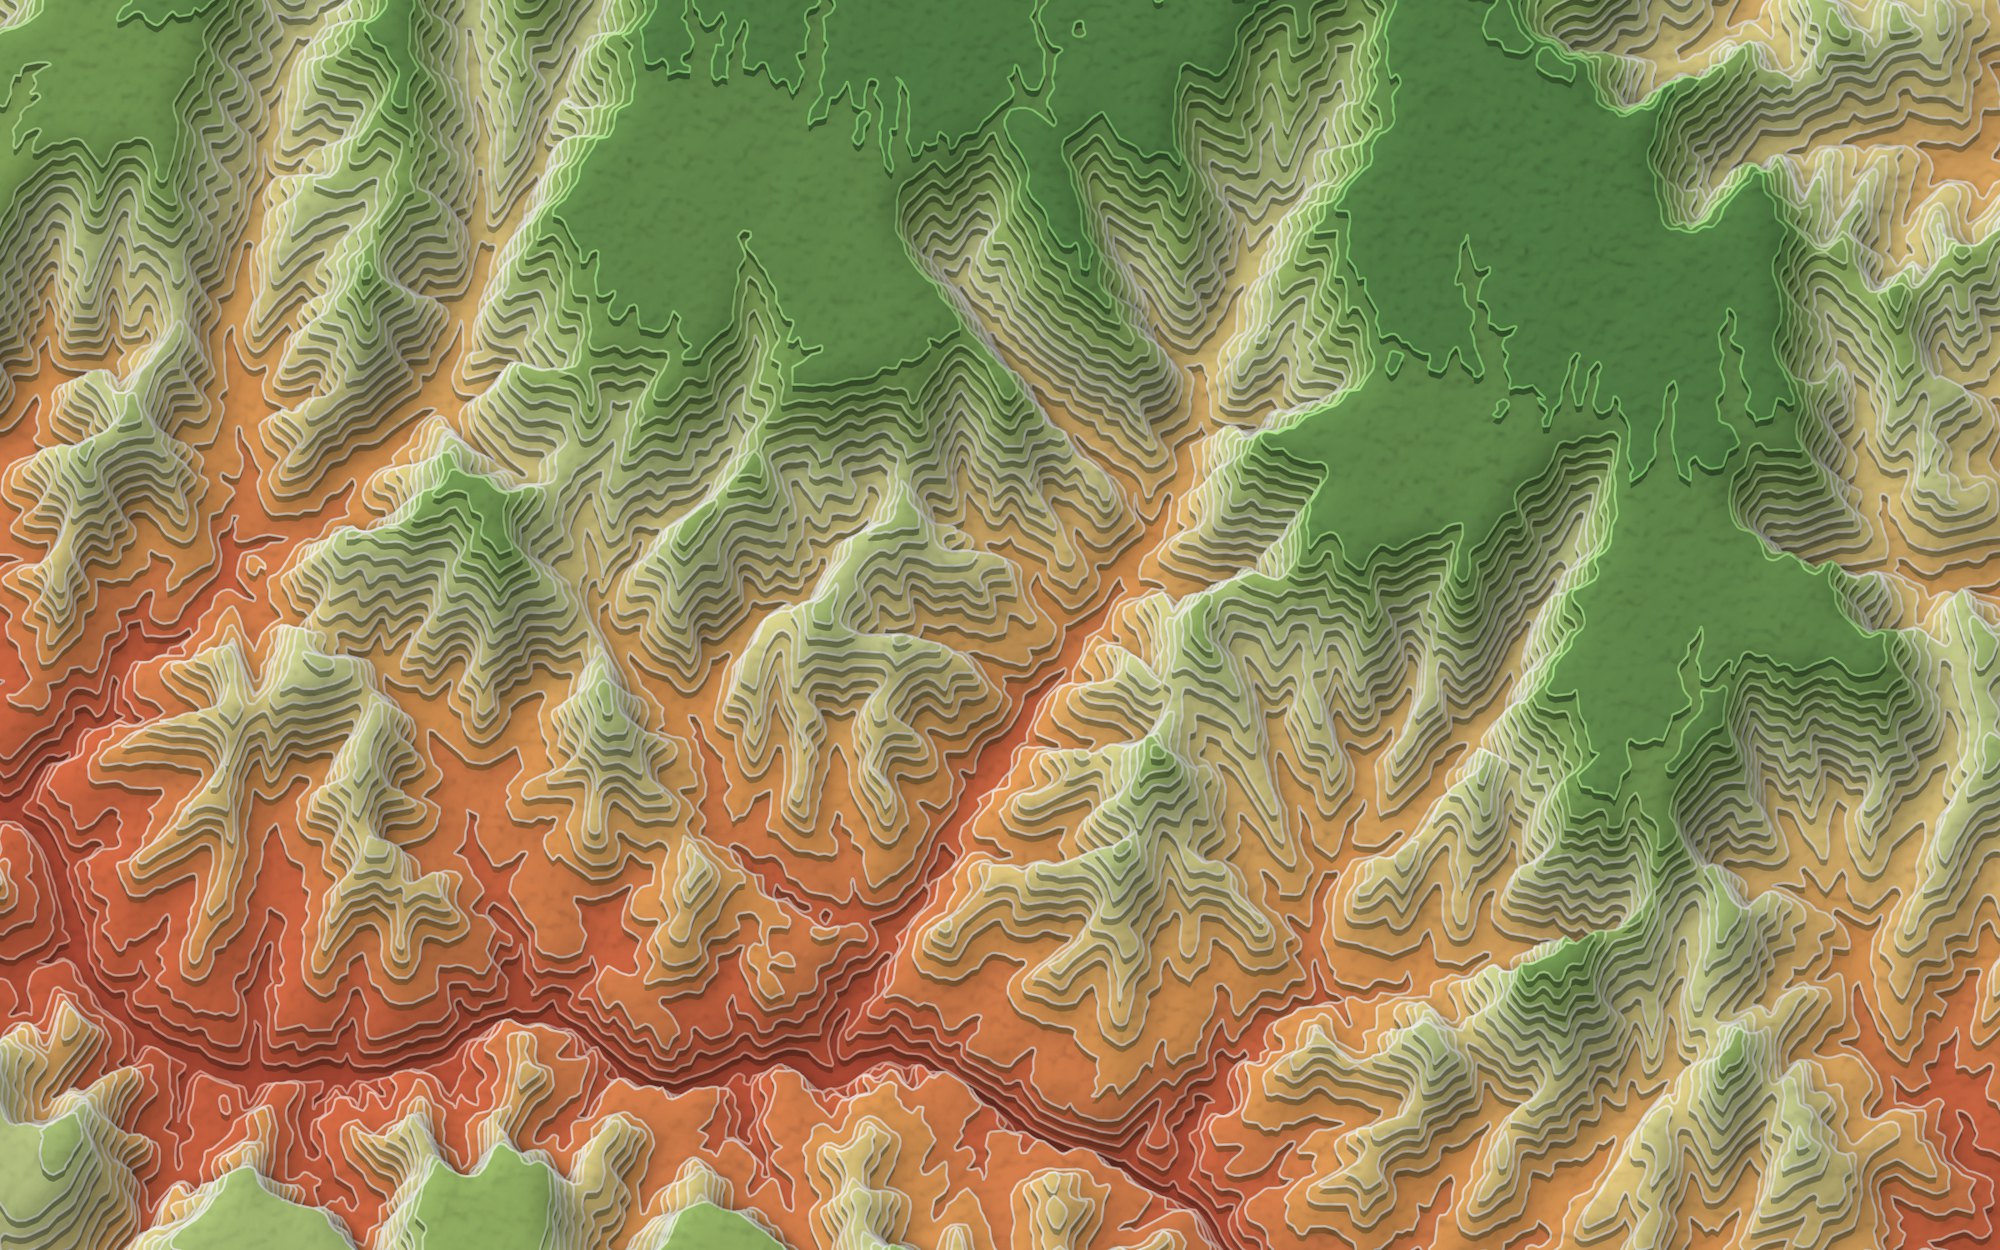
Oblique stacked terrain of the Grand Canyon, slabs lifted with walls showing
ObliqueSlabs lifted north, walls facing the viewer in the south.
Nadir stacked terrain of the same area, slabs in place with soft shadows
NadirSlabs in place: depth from shadows falling away from the light and lit edges facing it.

Clipped to any outline

An optional area of interest clips the slabs exactly to its outline, so the edges follow a park boundary or a watershed instead of the DEM's rectangle.
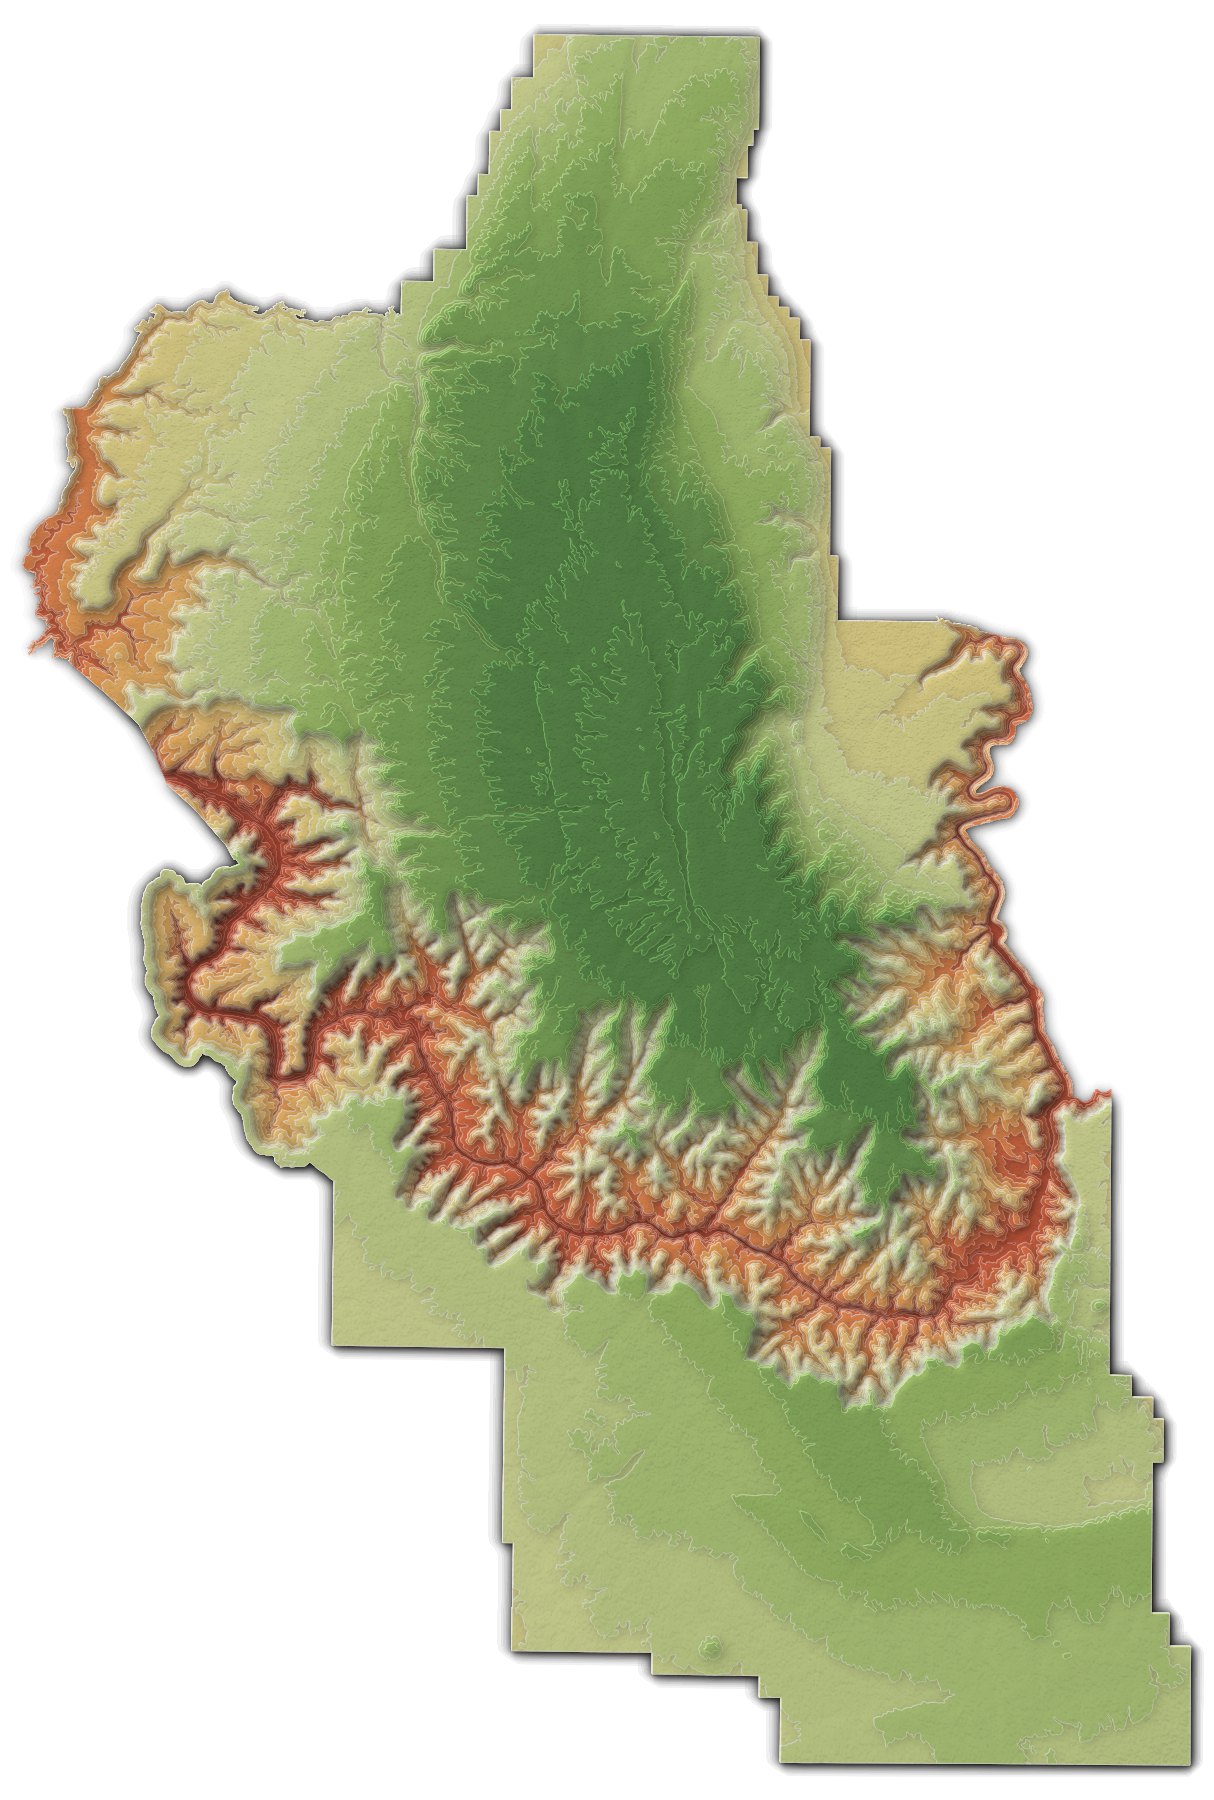
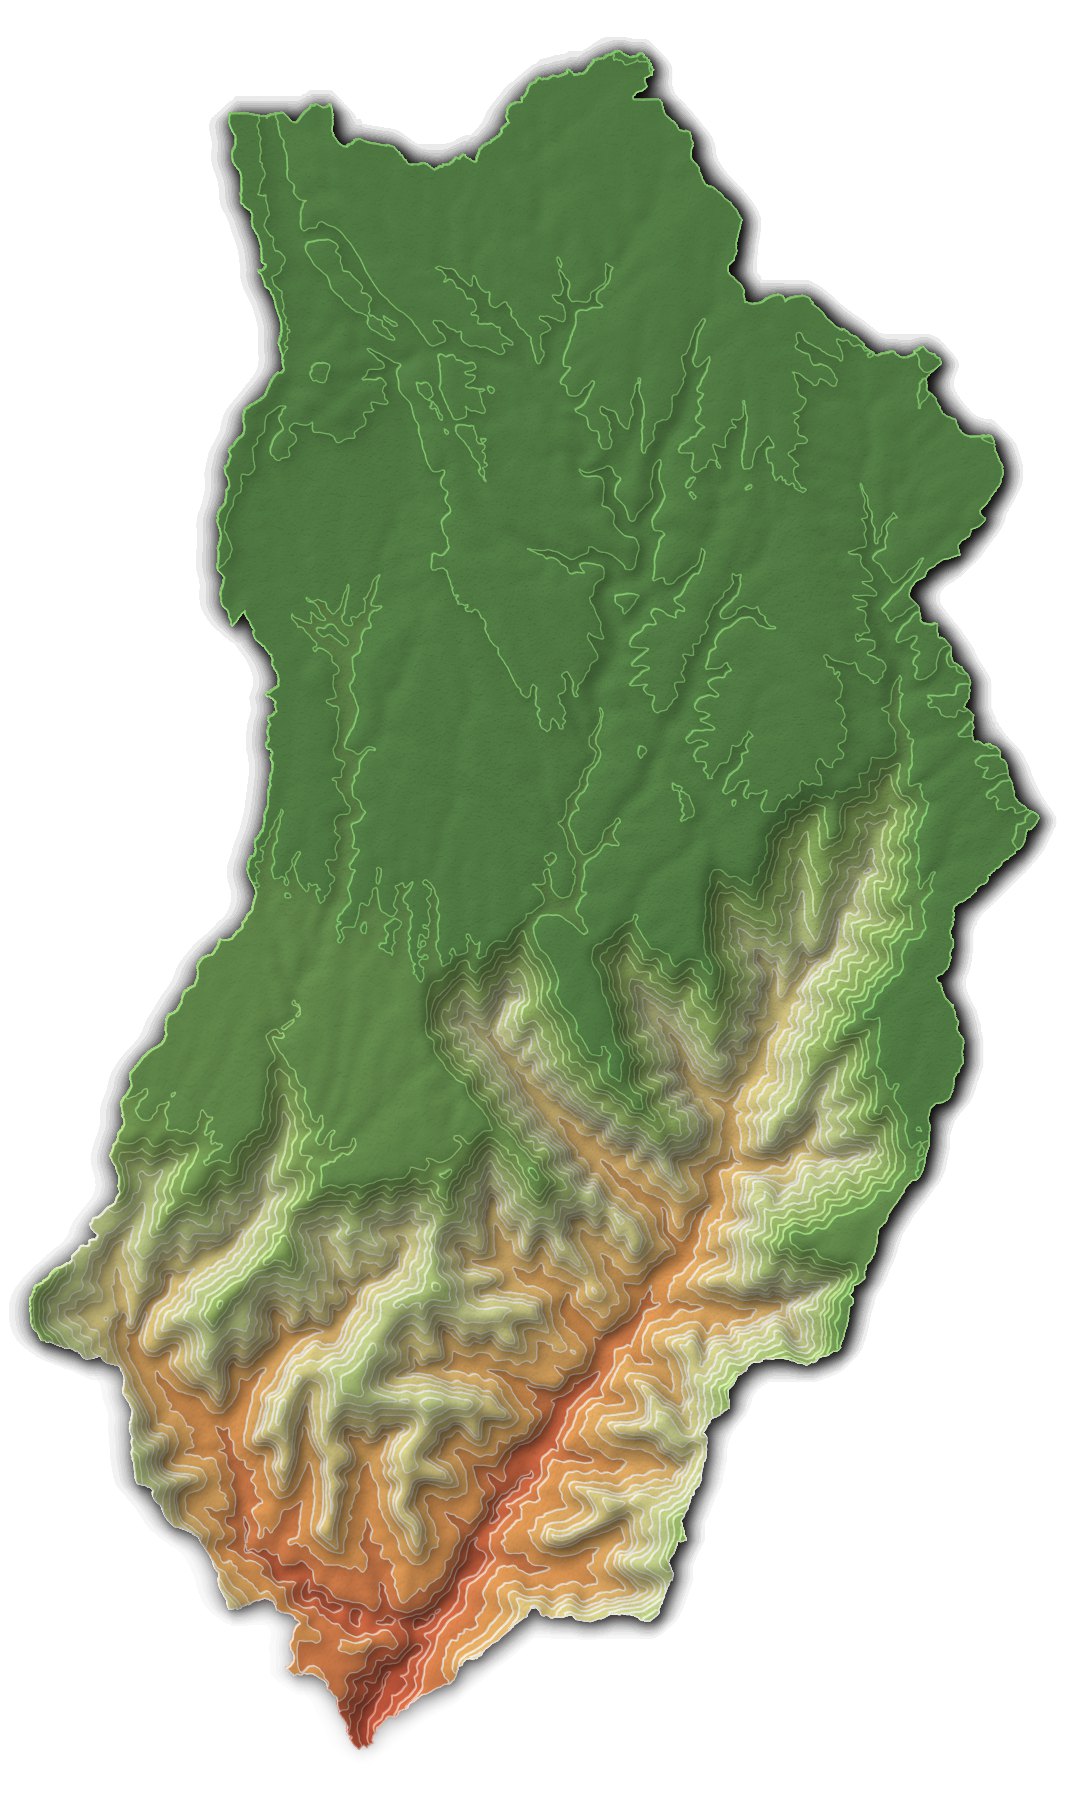
Stacked terrain clipped to the combined outline of Grand Canyon National Park and the Kaibab National Forest
Grand Canyon National Park and Kaibab National ForestNadir view, clipped to the combined park and forest outline.
Stacked terrain clipped to the Bright Angel Creek watershed
Bright Angel Creek watershedNadir view, clipped to the watershed used in my Dragon Bravo Fire map.

Styles

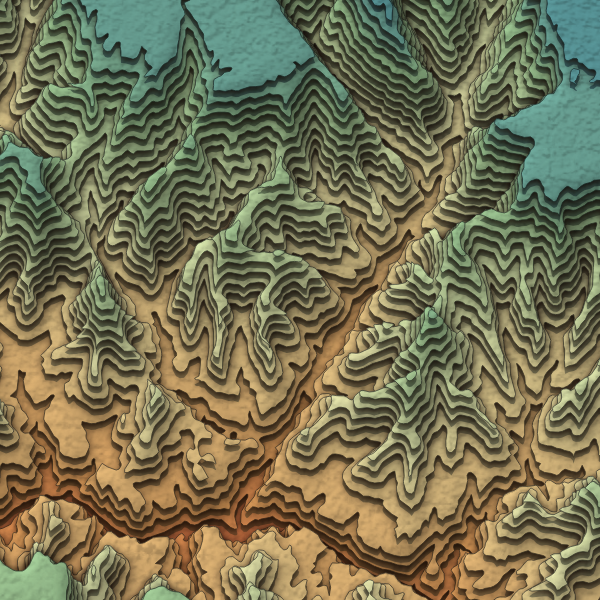
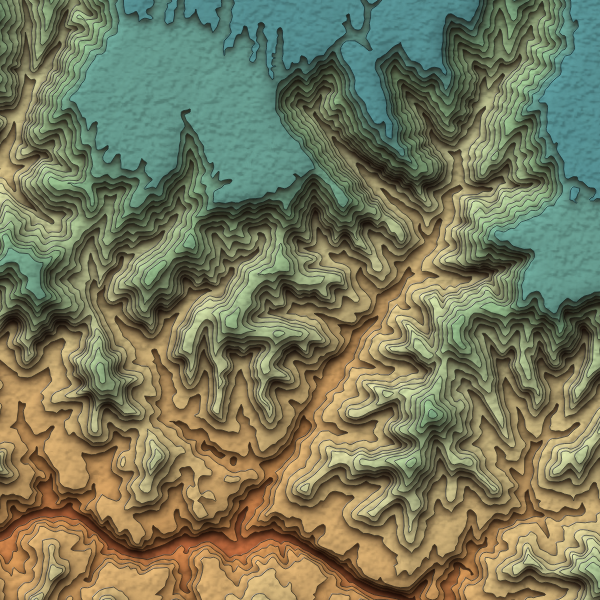
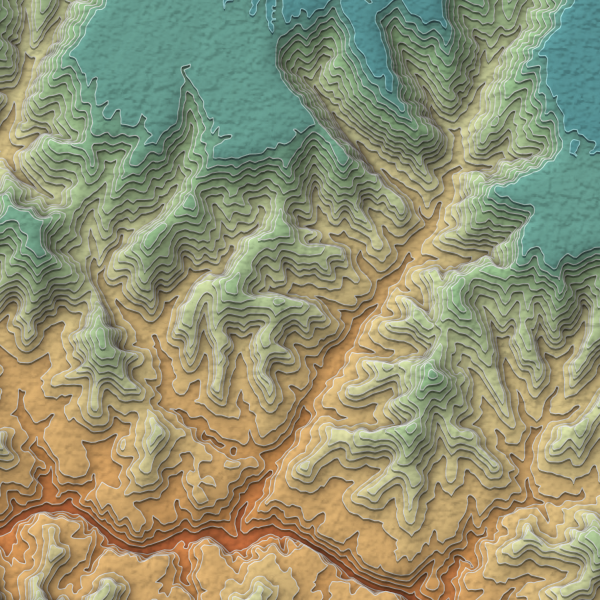
Three styles set the lift, walls, edges and shadow. Shown on a 16 km square around Bright Angel Canyon with the Spectral ramp.
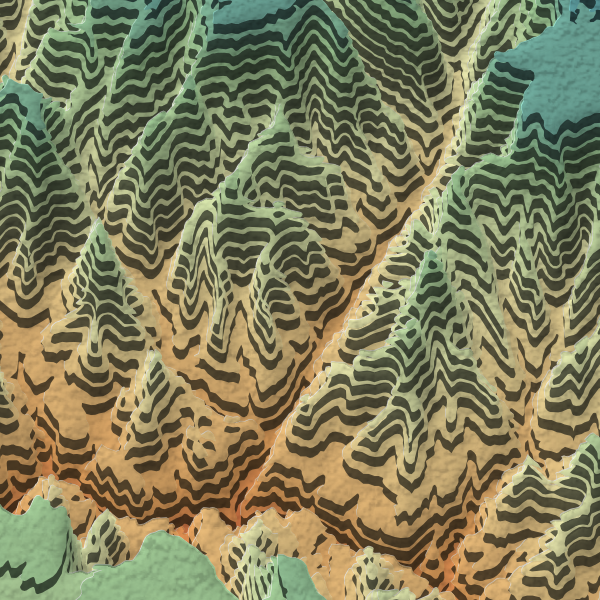
Offset slabs style: tall dark walls under every slab
Offset slabsTall, dark walls: the original offset look.
Paper layers style: thin sheets with pale edges and soft shadows
Paper layersThin sheets, pale edges, soft shadows.
Cut card style: dark edges and deep shadows
Cut cardThick card, dark edges, deep shadows.
Cut card in a nadir view: slabs in place, depth from shadows
Cut card, nadirSlabs in place, depth from shadows.

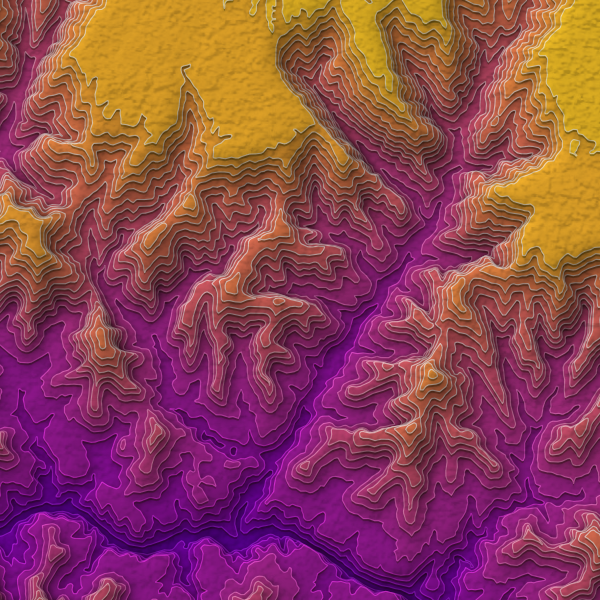
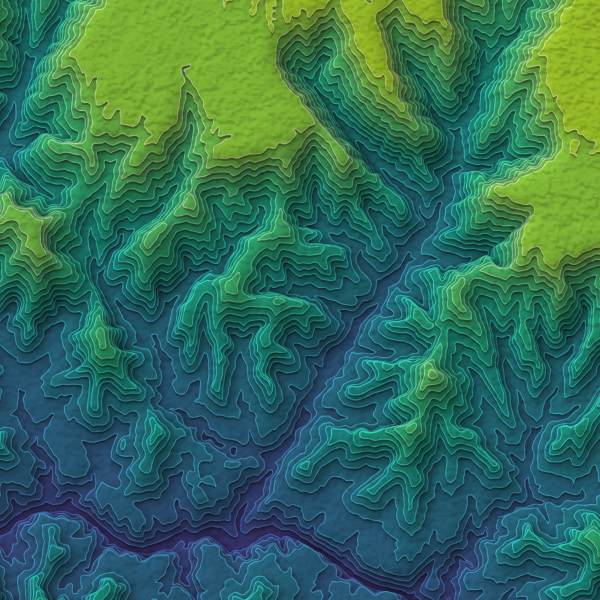
Nine color ramps

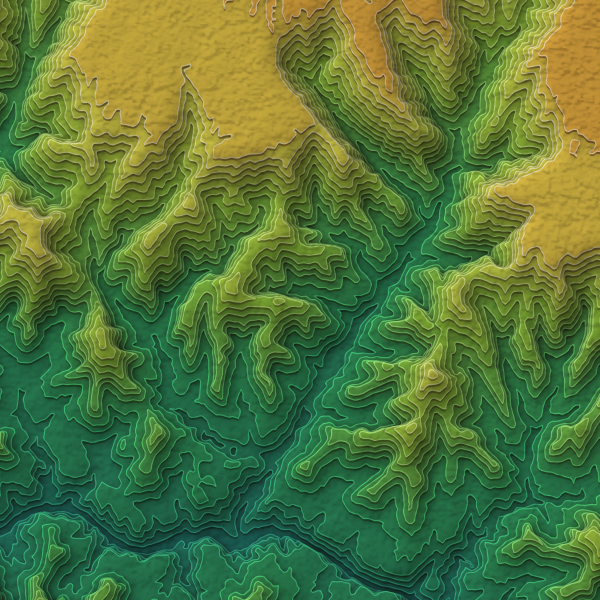
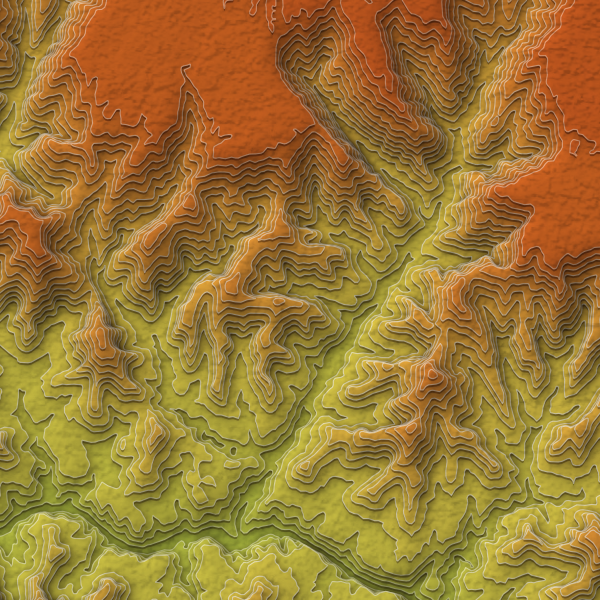
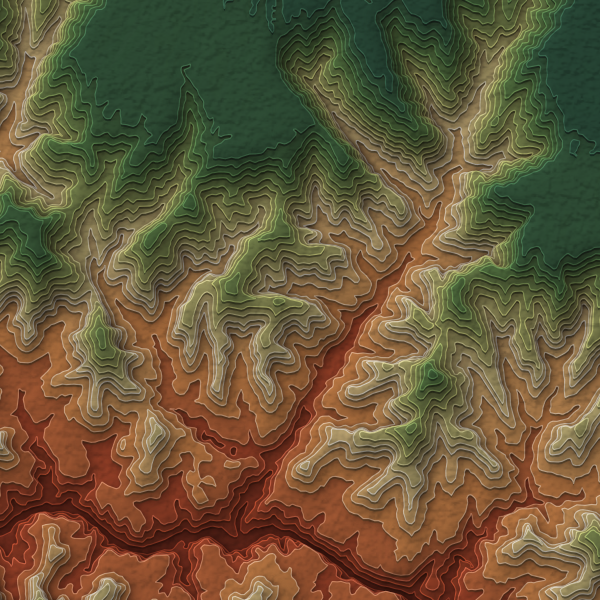
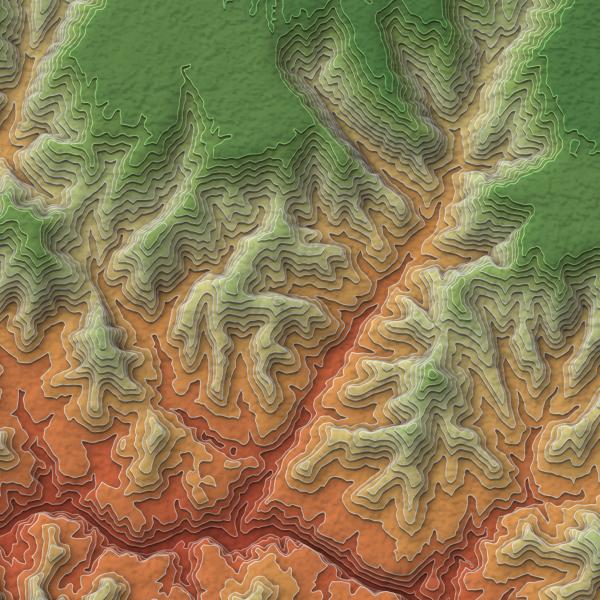
Switch ramps on an existing layer without rerunning. The two Grand Canyon ramps are pinned to real elevations, so their colors mark life zones: red rock at the river, desert scrub and woodland, then forest on the rim.
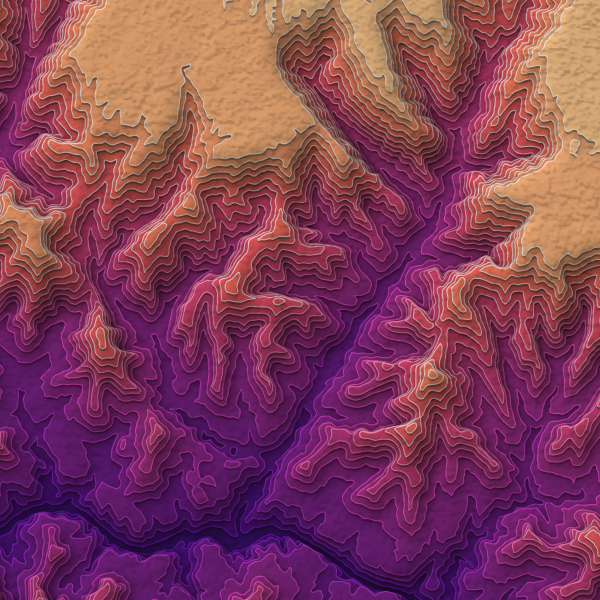
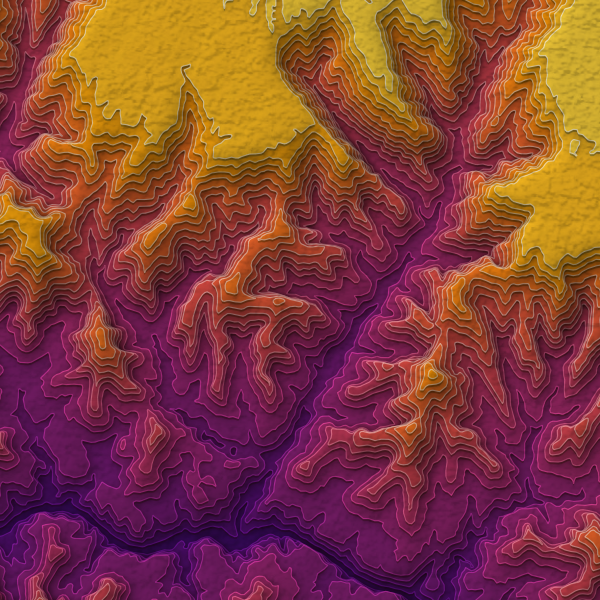
Stacked terrain of Bright Angel Canyon with the Magma ramp
Magma
Stacked terrain of Bright Angel Canyon with the Inferno ramp
Inferno
Stacked terrain of Bright Angel Canyon with the Plasma ramp
Plasma
Stacked terrain of Bright Angel Canyon with the Viridis ramp
Viridis
Stacked terrain of Bright Angel Canyon with the Spectral ramp
Spectral
Stacked terrain of Bright Angel Canyon with the Teal-Orange ramp
Teal-Orange
Stacked terrain of Bright Angel Canyon with the Lime-Orange ramp
Lime-Orange
Stacked terrain of Bright Angel Canyon with the Grand Canyon ramp
Grand Canyon
Stacked terrain of Bright Angel Canyon with the Grand Canyon Light ramp
Grand Canyon Light